Why Not Equality for Wood?

Why does an obscuring mask of dirt and grime increase the value of old furniture but decrease the value of old paintings? Is it curious to anyone else that appraisers always recommend cleaning paintings and jewelry, even rugs, so that we can enjoy the detail; but want to see the same dirt, cigarette smoke, and general grudge left on beautiful wood? 

The beauty of wood furniture and gifts is a combination of several ingredients:  the overall design – combination of straight lines and curves, shapes and proportions; woodworking – joinery used, execution skill; and artistry – the wood’s color, grain pattern, character and figure created by Nature, how the grain patterns are used, how the boards are sequenced and combined, and sometimes how different woods are combined.  A mask of dirt and grime obscure both the woodworking and the artistry.

An admired painting invites closer attention to details – how the major components are spatially arranged, how each component interacts with the others, the amount of detail used for each component, how colors and brush strokes are layered, and so on.  The effect is to draw your attention to finer and finer detail, and each time you do so you are rewarded visually and emotionally.  When new, antique furniture offered the same ongoing pleasure for its owner. 

Some boards have little or no character – use them for the bottom and back.  Others have strong oval and arch grain patterns that would visually detract from interplay of components and overall design, or from the style - again, use them only in appropriate styles and then in visual balance.  When one looks below the dirt and grime on magnificient antiques, we’ll see those were the practices of the skilled craftspeople who built them.

Perhaps someday it will be possible to clean furniture, as one would clean a dirty painting, without losing most of its appraised value.

 

Mother’s Chair Came Apart

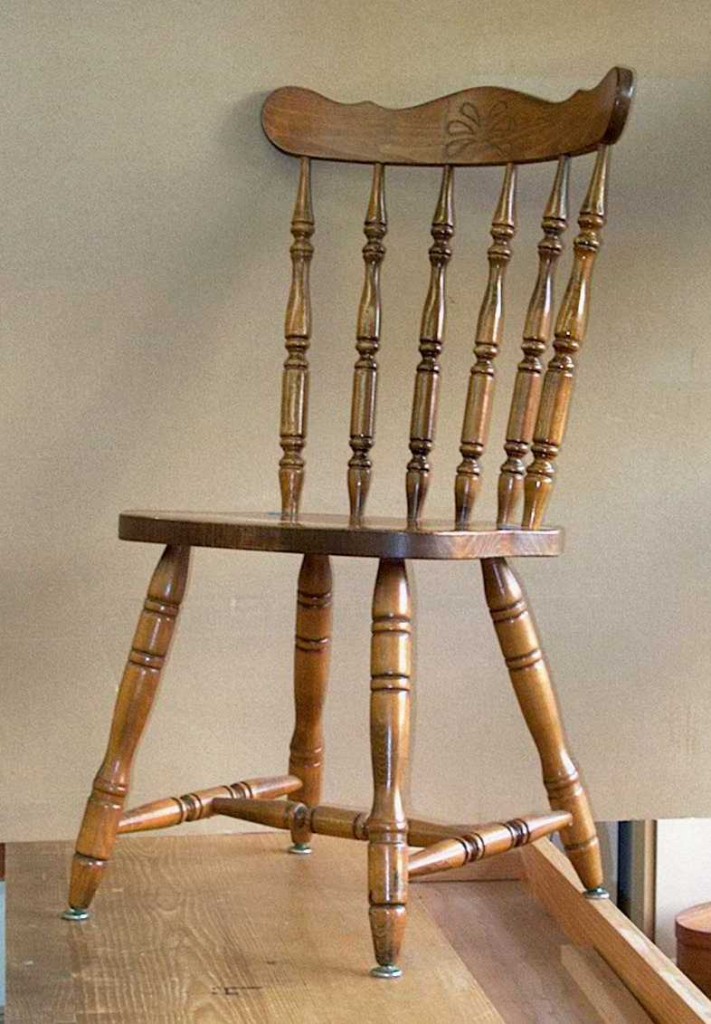
This chair came from my mother’s apartment when she moved to a senior living center.  Its joints were loose when she had it, and kept coming apart when I lifted it injudiciously.  Although I build new  rather than repair repair old furniture, yesterday I decided to investigate.  It is comfortable at my computer desk and I hope to continue using it for several years,

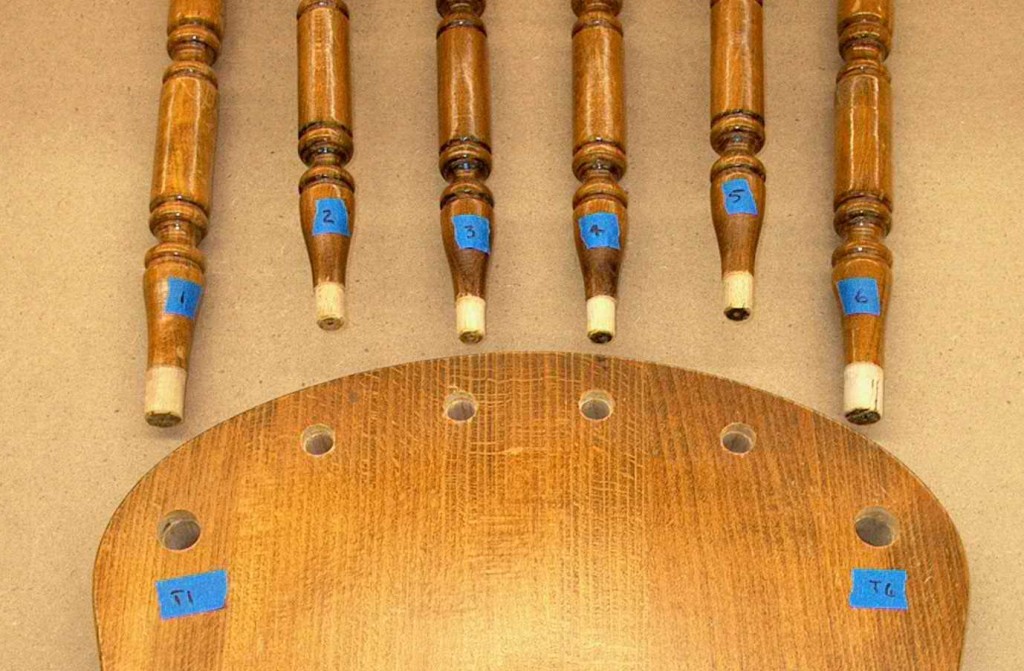
After carefully labelling everything. I began to disassemble loose joints.  All but seven of the twenty-two joints came apart.  The above picture shows the drilled holes, called mortises, in the top of the chair seat and the light colored tenons at the bottoms of the chair back spindles.

Examining these and the disassembled joints below the chair seat, it became obvious that the joints were “glued” by squirting glue into the bottoms of the mortises and then inserting the tenons.  The rationale may have been that glue would be forced up around the sides of the mortises and tenons, but that happened only a few of the fifteen disassembled joints, and even there only on a portion of the surface area of those joints.

Regardless of the glue used, for the strongest possible joint the adhesive must be worked onto all joint surfaces.  Spreading glue simply by bringing together the parts of a mortise and tenon joint does not work the glue onto the entire area of matching surfaces, so the joint has diminished strength.  (In an article a year or two ago Popular Woodworking magazine clearly demonstrated this using a rectangular motise and tenon joint, where one side of the mortise was clear plastic.)

It is widely recognized that glue does not bond well to end grain.  For the majority of the disassembled joints in this chair, the only glue contact with the tenons was on their ends, which of course is end grain.

Finally, the excess space at the bottom of a mortise is designed to provide space for any glue forced to the bottom when the tenon is inserted, and should not be filled with glue.  In the procedure used on this chair (and others I have seen) all of the glue is first squirted into the bottom of the mortise.  When the tenon is inserted this filled well creates hydraulic pressure resisting full insertion of the tenon, and perhaps permanently holding the tenon slightly proud.

Although the parts of mother’s chair were machined well and attractively finished, failure of the joinery was guaranteed due to the poor glue application.  Gently used, and with finish contributing some additional slight joint strength, such chairs might last a year or two, but the joints will fail.

Effective chair repair requires proper adhesive, tools and experience.  Simply squeezing some more glue around an exposed joint and pushing it home won’t make a lasting repair, and will make effective repair more difficult and expensive.

If you have a wobbly chair you want repaired, perform diligent research by soliciting referrals from friends, interviewing repair businesses, and getting estimates.  Expect to pay at least $100 for re-gluing the most basic chairs, more for chairs such as this one with extra joints.  If the chair has upholstery attached to the chair itself (rather than a seat insert) the upholstery will have to be replaced after re-gluing.

Factory-made chairs can be unbelievable bargains in the store, but re-gluing or replacement should be part of the purchase calculation.  For any set of new chairs, one might want to plan for replacement or re-gluing of at least one chair every year.  If subjected to stronger use, the time period should be six months.  Effectively re-glued and not abused, the chair should provide many years of service.

Please let me know of other topics you would like to see covered in future posts.

It’s All In The Thumb

Single boards are almost never wide enough for even relatively narrow applications such as door panels, nightstand sides or headboards.  Thick glue lines are usually areas of weakness because most glues lack internal strength.  Thick glue joints also form noticeable straight lines that detract visually from the appearance of furniture.

The board edges left by machine jointers are pretty good, and are used without improvement in factory production.  Slight changes in pressure and speed as the board is feed through the jointer causes dips in the edge, as will bits of sawdust thrown onto the jointer table by the machine.  These dips result in areas of thicker glue lines.

Woodworking craftsmen of earlier times always dressed the machine-produced edge with a long hand plane to further refine it.  Even with today’s improved machine jointers, my experience is that several passes with a jointer hand plane are always needed before a full length shaving is obtained.

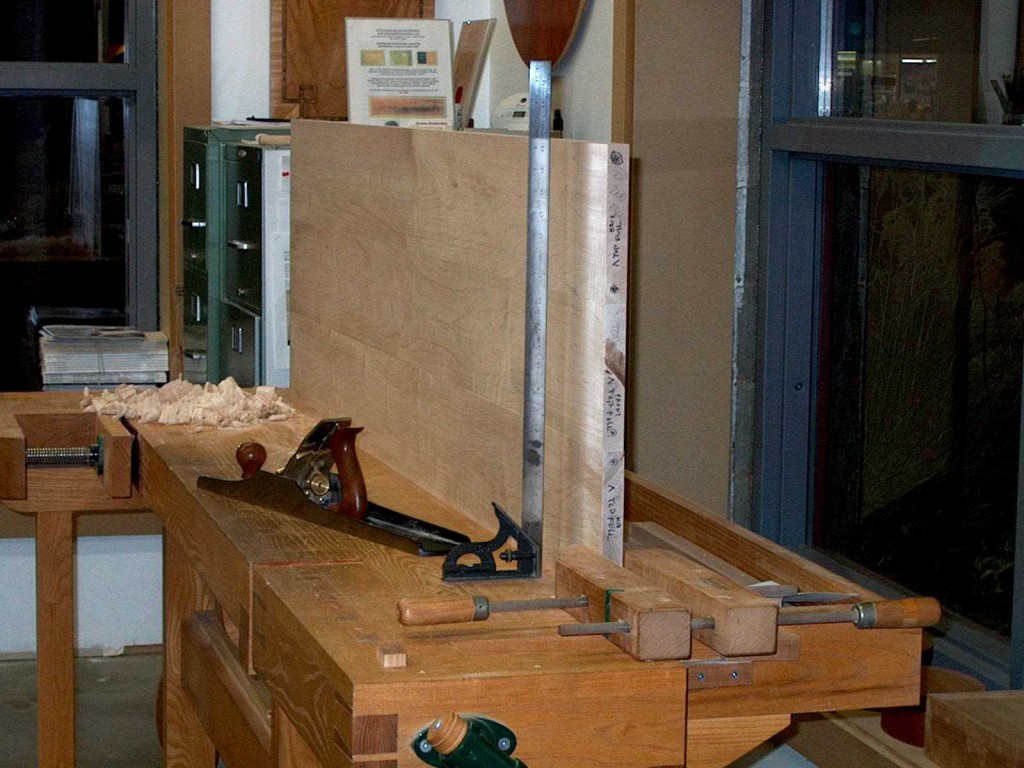
After hand plane jointing, I always check that the edges are still perpendicular to the board faces.  Sometimes I’ve found that hand planing introduced a slight change from a 90 degree angle, too slight to see with a T square but noticeable when the boards are dry stacked as in the above picture.

A call to Lie Nielsen, the hand plane manufacturer, suggested I pay attention to the position and pressure applied by my thumb at the toe of the jointer plane.

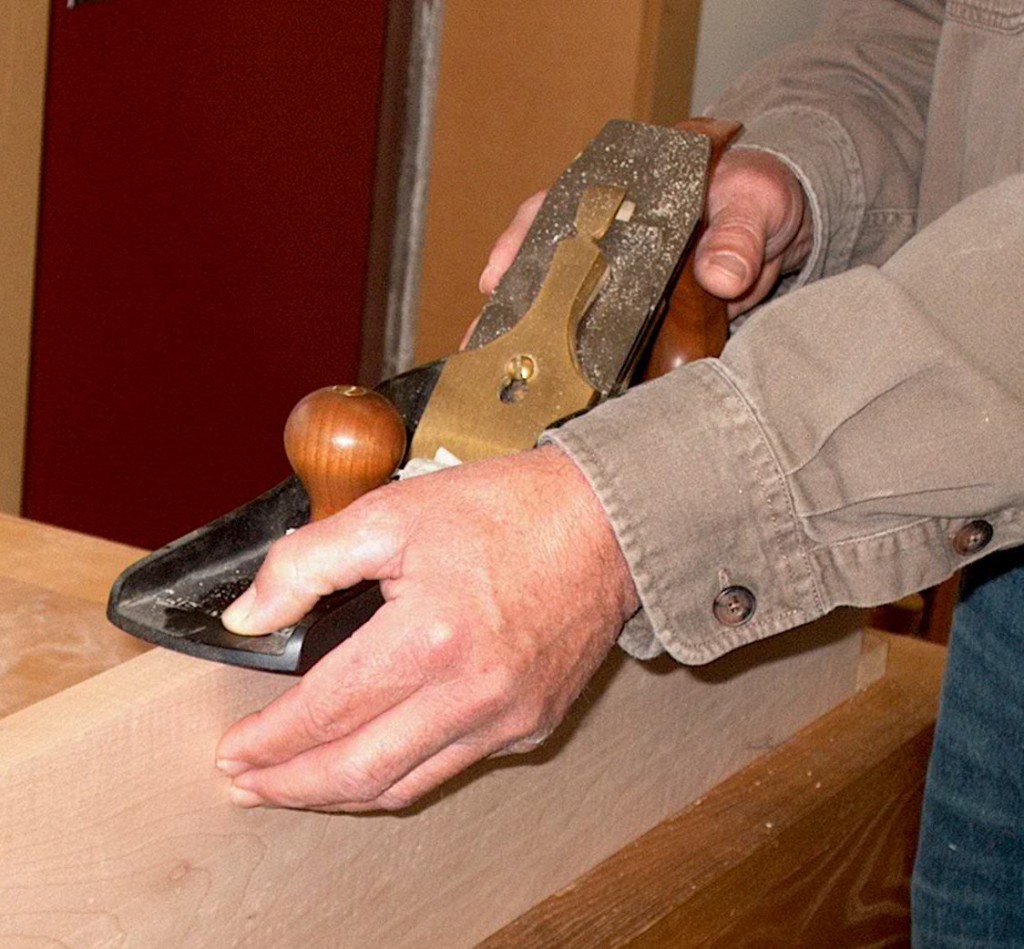
In this picture, my thumb is over the left corner of the edge.  The shaving will be slightly thicker under my thumb..
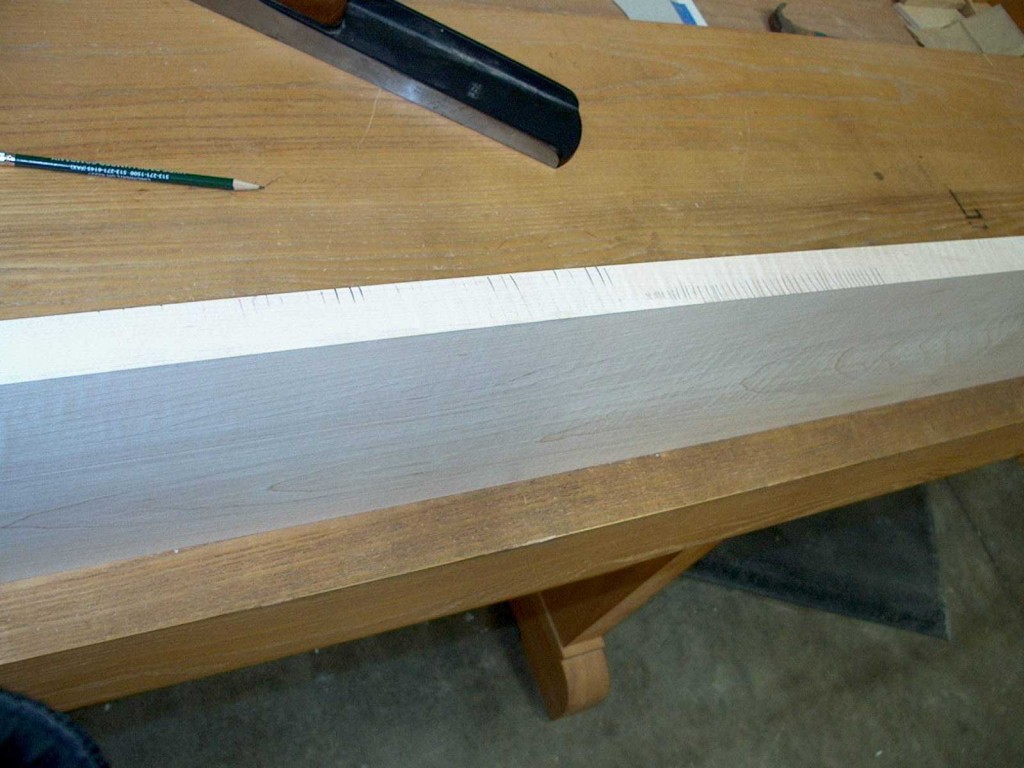
Pencil lines were drawn across the edge before a shaving was taken, moving the plane from right to left..  In about the middle of the picture, I moved my thumb from the right side of the plane’s toe to the left side.  While faint, pencil lines remain along the left corner of right half of the board, and along the right corner of the left half of the board, showing how the shaving was effected by nothing more than moving my thumb. 
While this may sound like much ado about nothing, when done properly refining the edge with a jointer plane takes only a minute.  Eliminating a glue line may contribute to a piece of furniture becoming a family treasure that is kept for decades.  And working to one’s best is a never ending quest to better understand and practice essential skills.

Improving Board Matches

(Part 3 of 3)  The final step in board matching is trimming edges for an even better match.

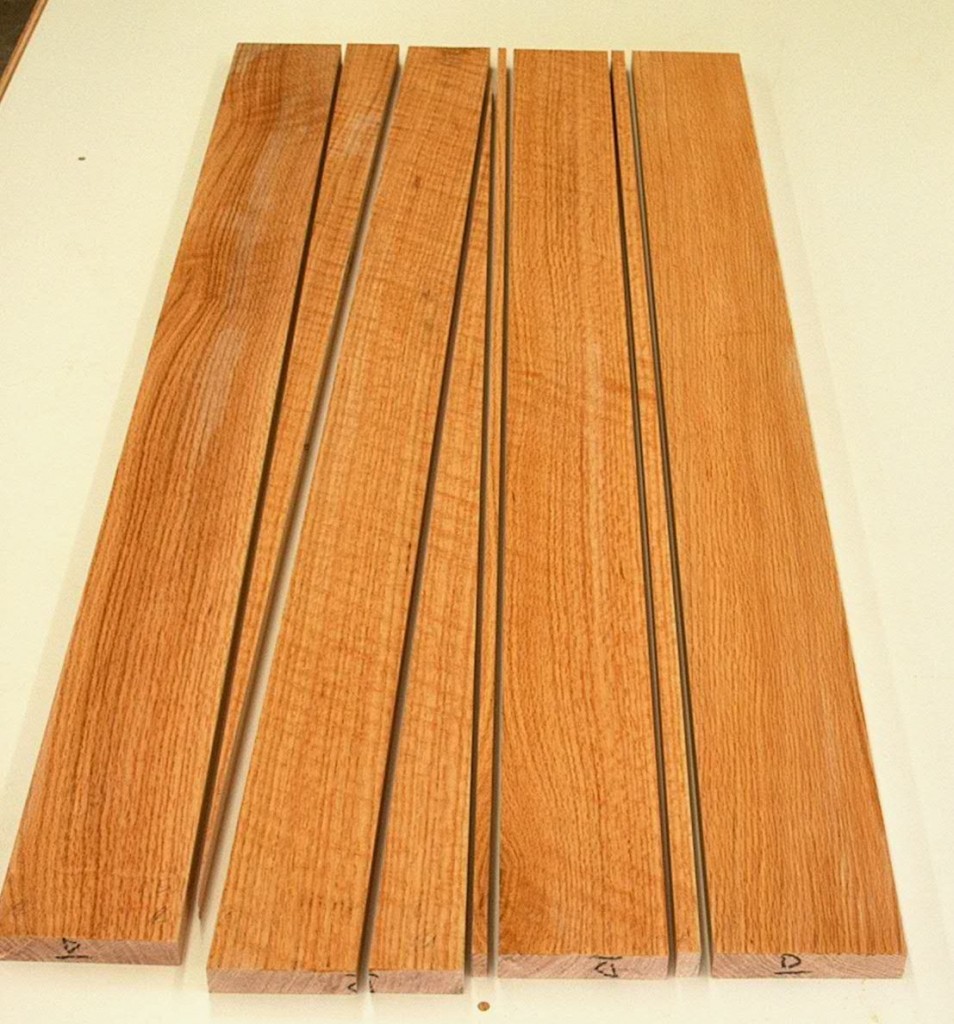
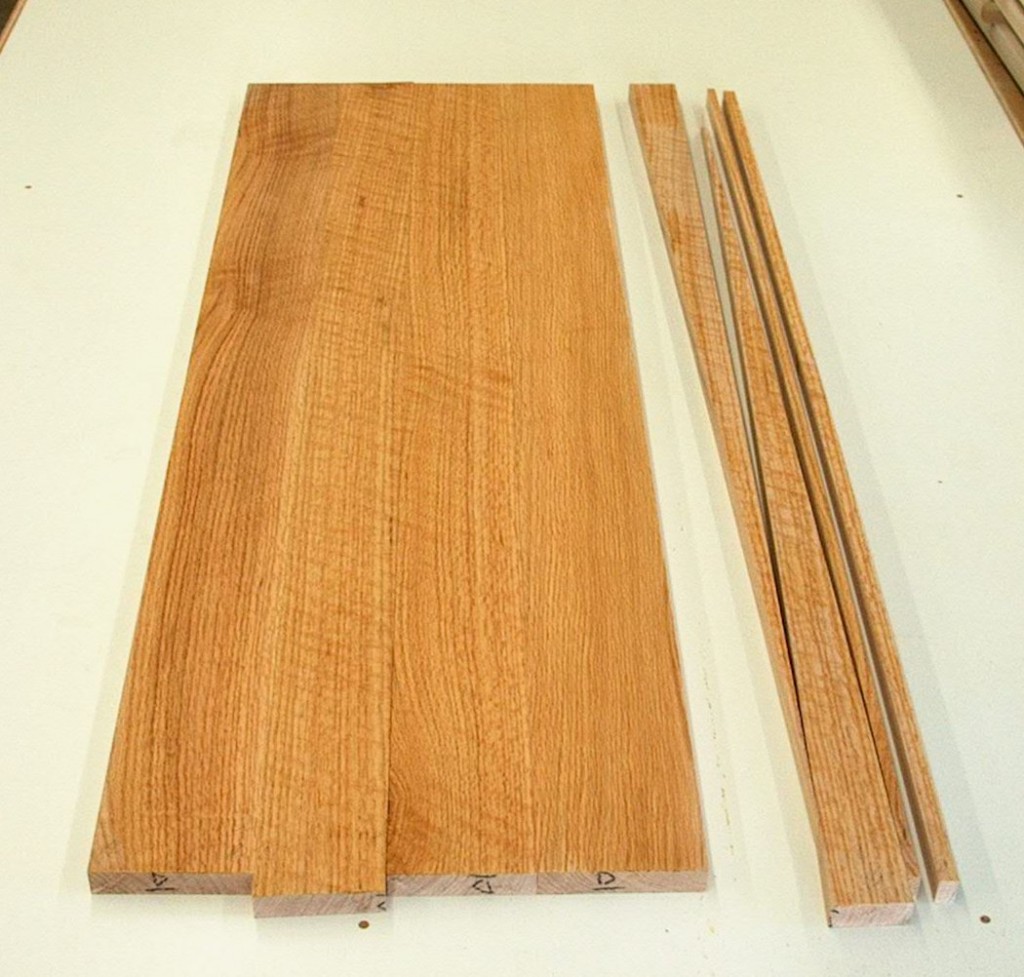
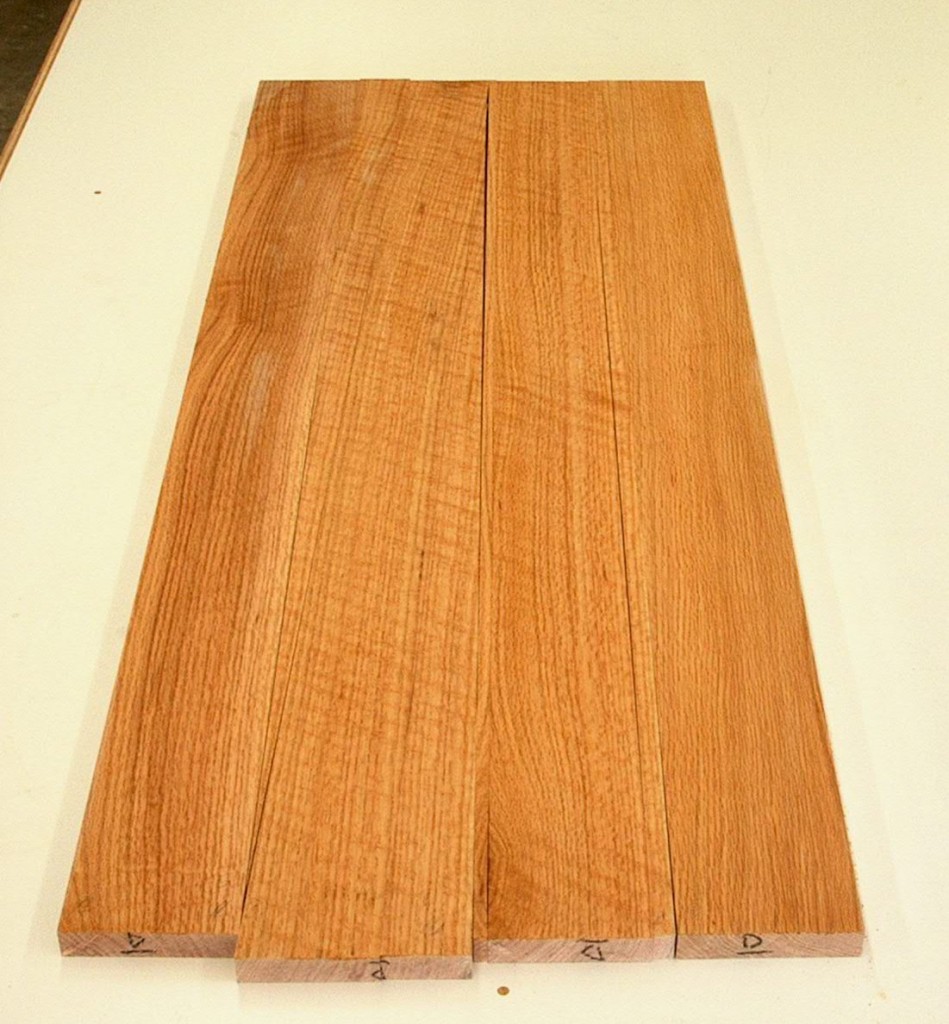
Here are four boards in selected orientation for a specialty cabinet side.  Color and grain pattern flow across the four  boards, but the overall appearance can be improved with five minutes of work.  On the right edge of the 2nd board from the right, there is a strip of sapwood that will stand out after finishing.  On the left edge of the 2nd board is a small defect on the back side.  And the grain pattern on the 3rd board from the right is diagonal to the edges, making more visible the joint with the adjoining boards.

Those trims have been made.

With the trimmings removed, the resulting matches between boards are improved.  The eye now sees the grain and fiigure of the wood without being distracted by joints.  It is hoped that with this attention to detail the piece of furniture is more likely to be used and enjoyed for many many years.

Poor Board Matches

(Part 2 of 3)  As a wood lover, I would hope all furniture to be kept and enjoyed for years if not decades.  All too often, furniture is replaced before the end of its useful life.  A visit to a local resale/antique store found some pieces of furniture with perhaps less than ideal board matches.

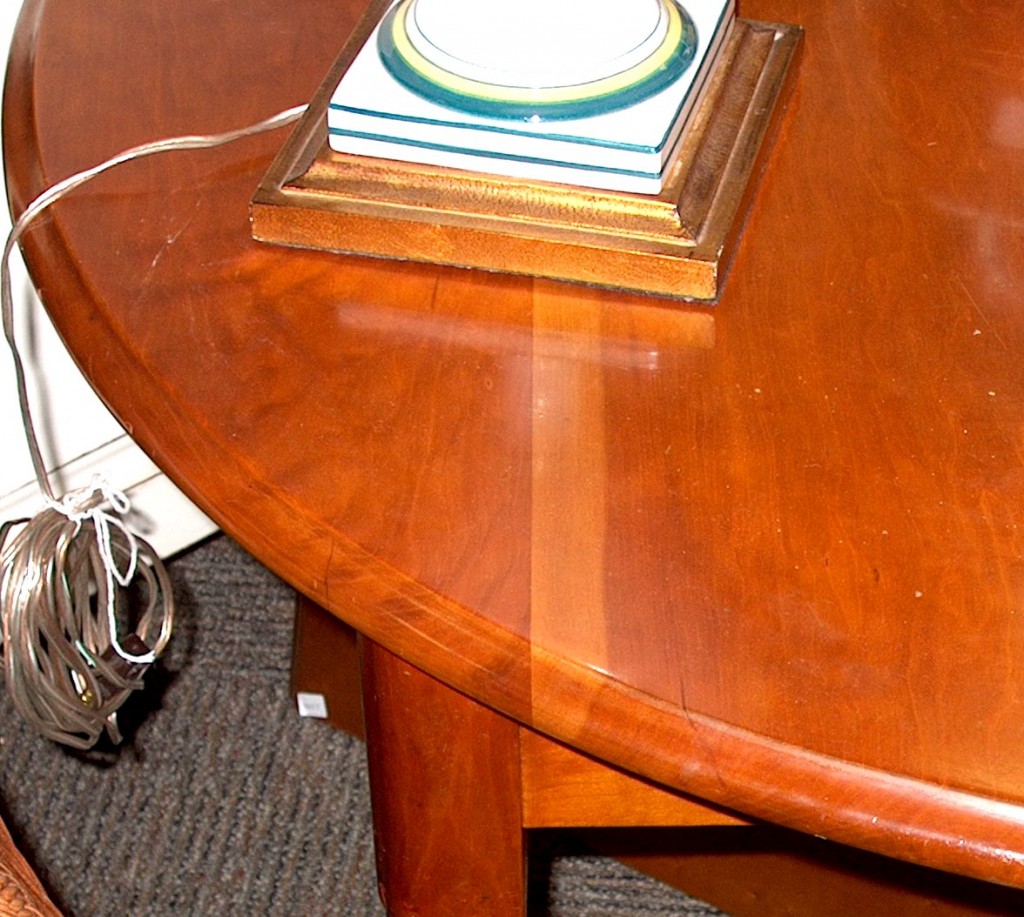
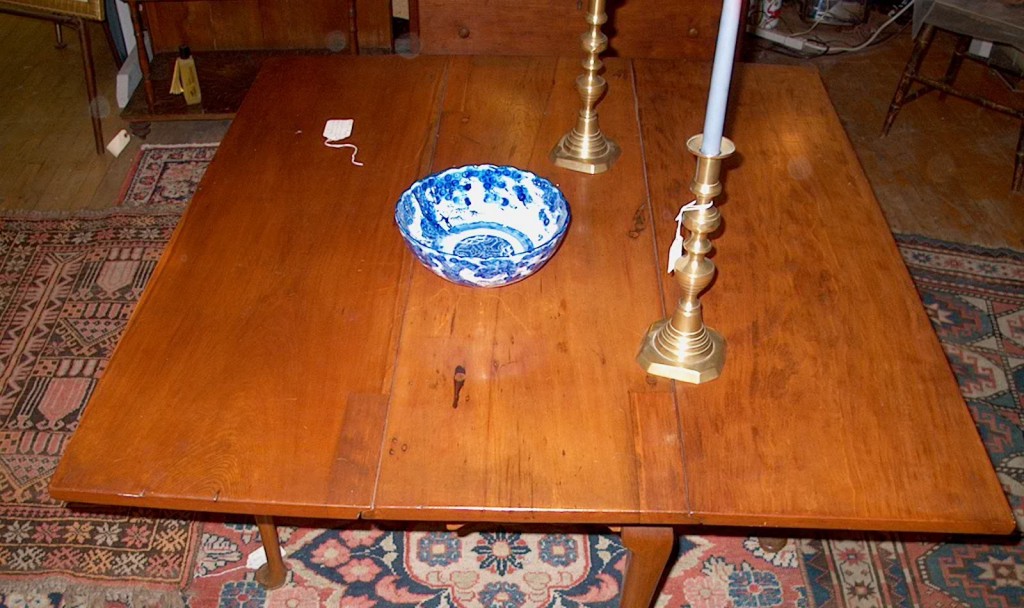
 This table, which showed almost no signs of use, had a strip of sapwood along the edge of just one of the boards in the top.

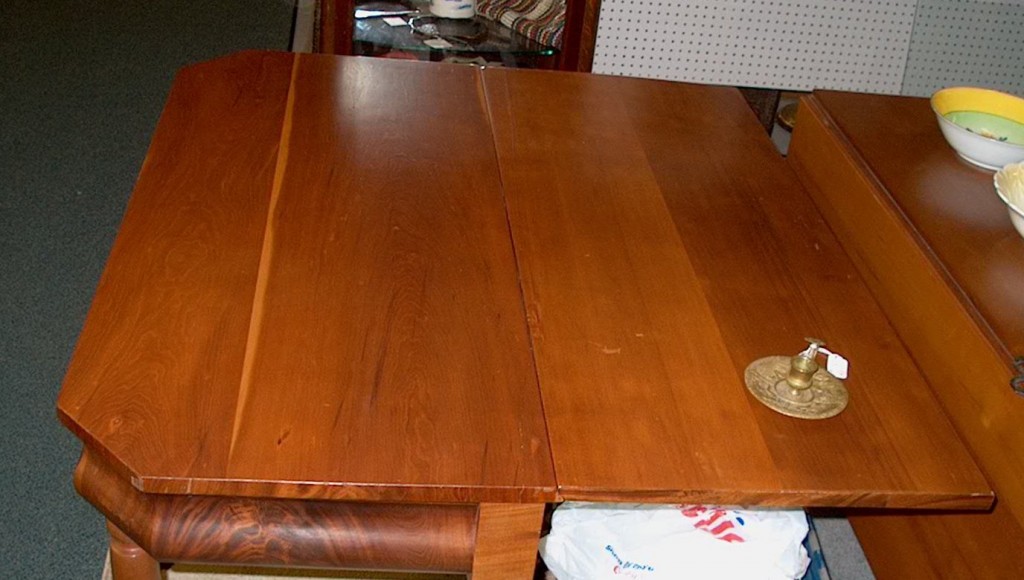
This older table has a full length strip of sapwood and a short one along the edges of one of the boards.  The sapwood is not used artistically, and is simply distracting.

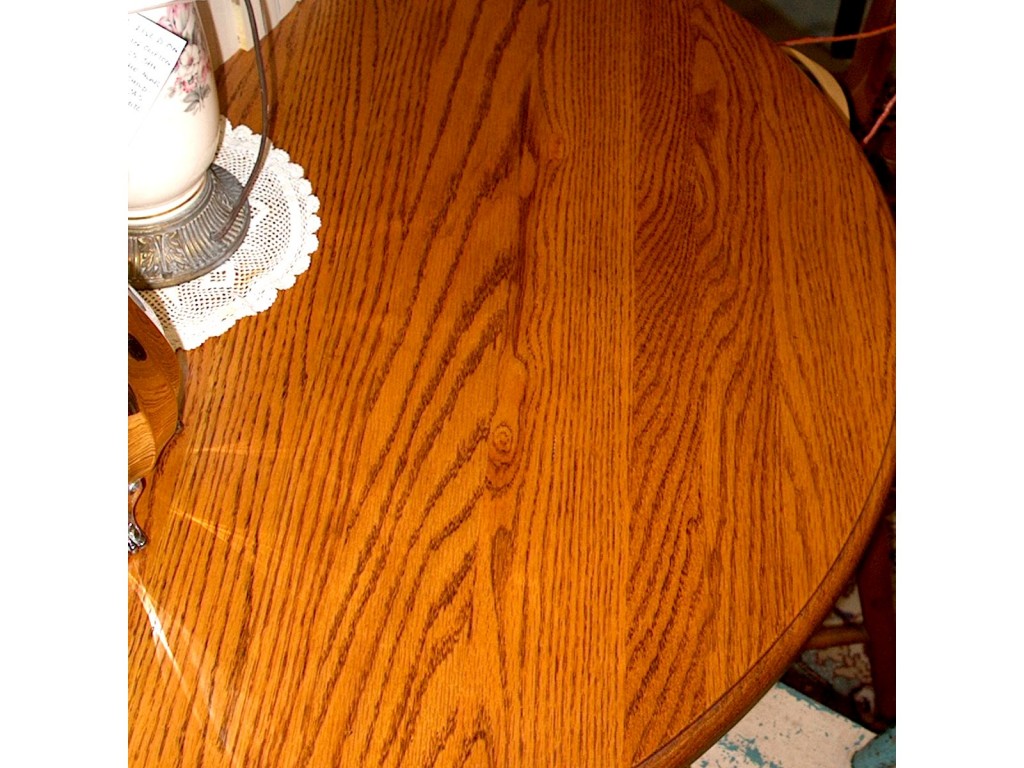
This table has a very disorienting collection of brain patterns and directions.  It is not surprising the table shows no wear.

Finally, here’s an older table with three very different boards.  The left one is very uniform, the middle one shows some character, and the right one has wonderful figure.  None of the three match any of the others, which it is suggested makes the table less pleasing in time.

People develop levels of attachment to items they own, including furniture.  These attachments can have visual, emotional, functional, and financial components.  The stronger the attachments, the more satisfying is ownership.  Good board matching assists strong visual attachment, while repeated viewing of poor board matches may foster disappointment, frustration, and early replacement, decreasing economic value to the owner.

Matching Boards in Furniture

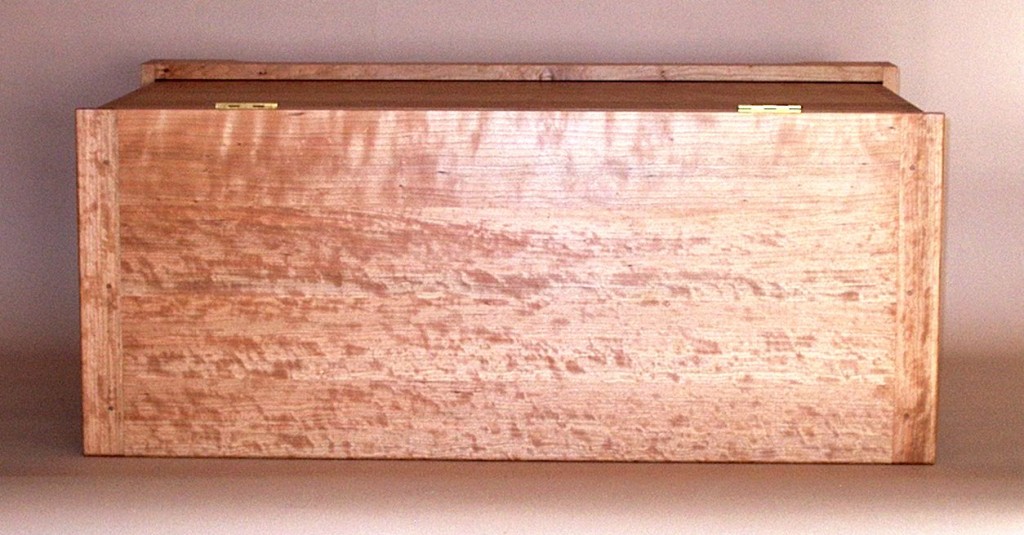
(Part 1 of 3)  It is always extremely rewarding when visitors ask how many boards are in the field on this cherry blanket chest top.  Unless creating a decorative effect such as a bookmatch, my objective is to minimize changes in color, grain pattern, grain direction and figure at joints.  Ideally, the viewer’s eye is drawn instead to highlights such as dovetailed corners and to the overall style of and proportion of the piece.  (There are two breadboard ends and four boards in the contained field.)

Good matches seldom happen by accident.  But only a few minutes are needed to evaluate alternative orientations and select the best.

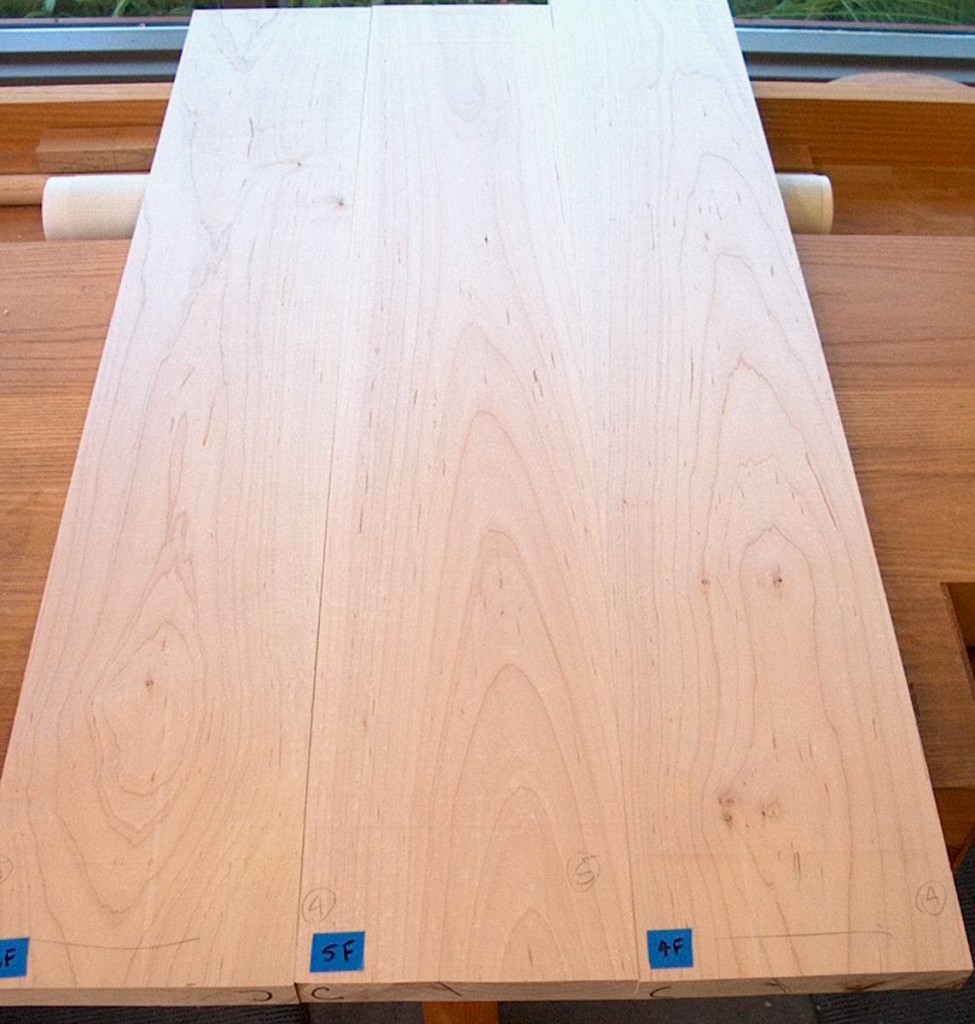
These three all white hard maple boards were selected for the bottom of a sideboard.  In this orientation, rejected, the oval-and-arch patterns in the outer boards are too close to what will be the edges of the glued assembly.

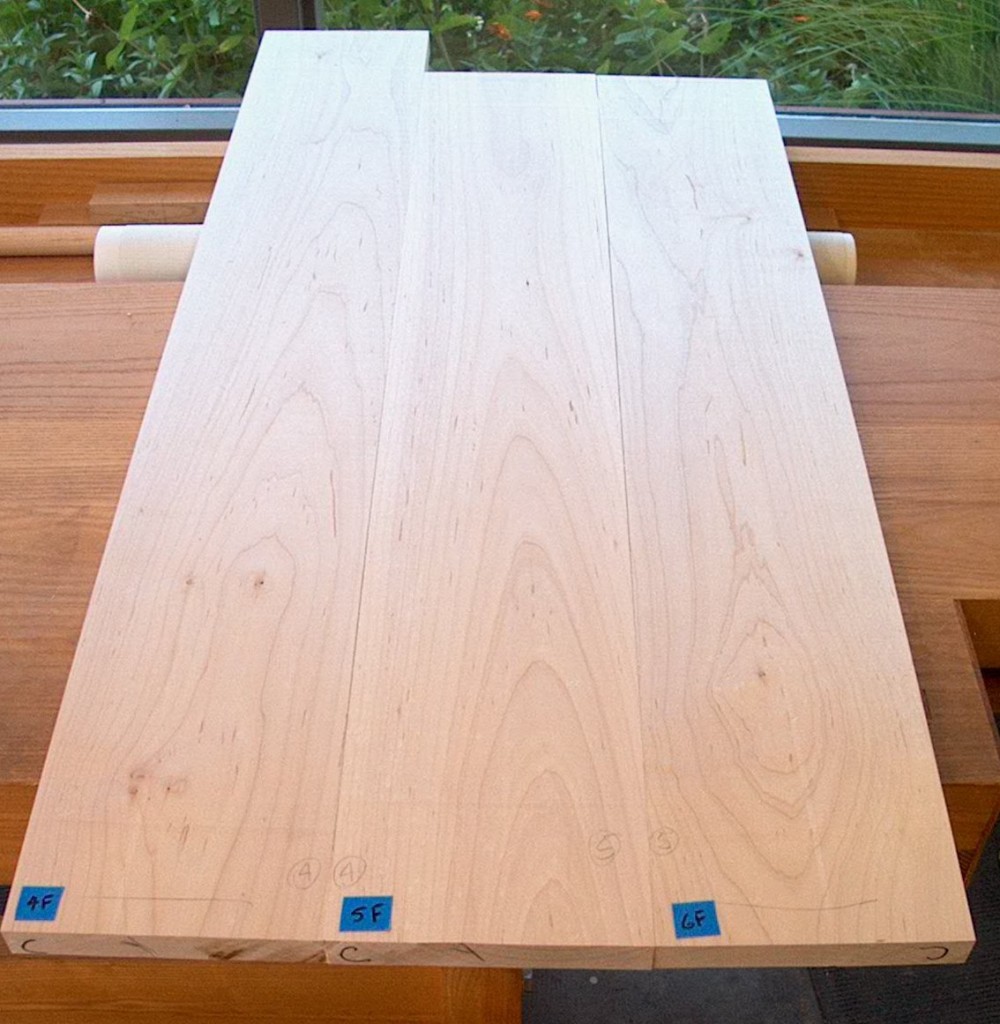
By simply swapping the first and third boards, a much more balanced appearance results.


Glues and Gluing

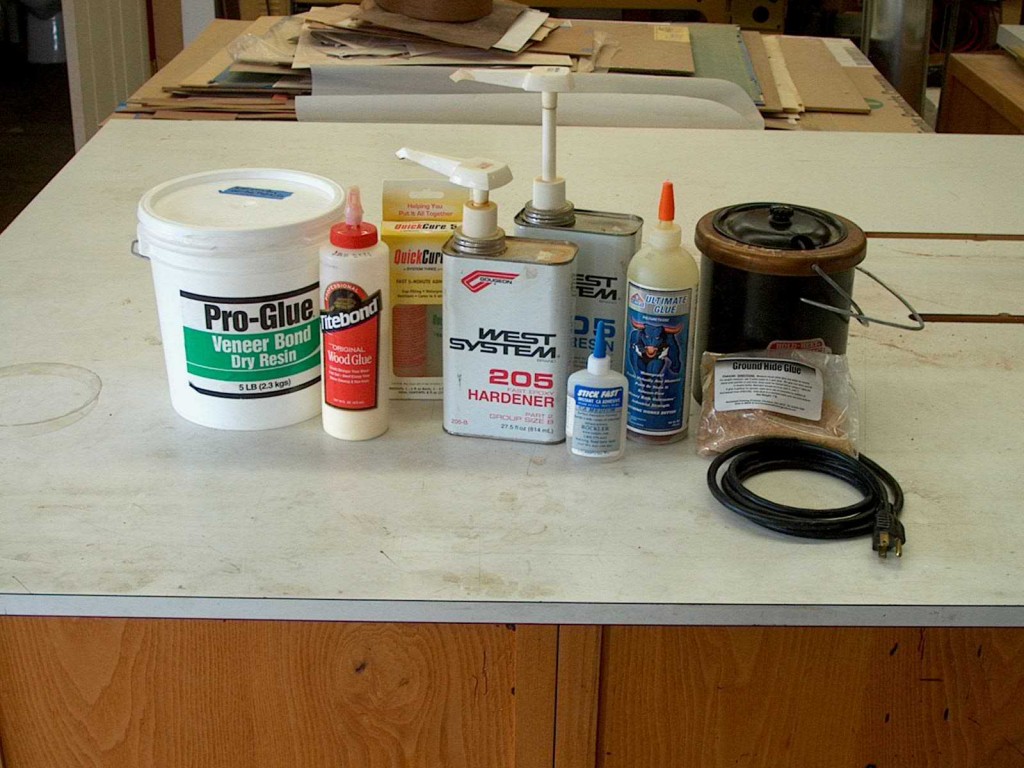
There are a number of common adhesives for woodworkers.  The two I use most often are plastic resin for veneering and hot hide glue for solid wood.  Occasionally I will use yellow glue for special situations, epoxy tinted with fresco powders to fill small defects, and expect to use cyanoacrylate as I explore wood turning.

There are several key fundamentals for strong glue joints.  When these are not followed, joints are much more likely to fail.

First, all adhesives must be used as intended by the manufacturer.  As examples, yellow glues skin over quickly, so joints must be assembled and clamped quickly; plastic resin glues need a minimum temperture of 70 degrees F to cure.

Second, glues need to be thoroughly brushed onto mating surfaces.  Applying a bead of glue to the end of a tenon and assembling the joint is very fast, but the adhesive bond is minimal.  Thoroughly brushing glue onto the sides of a mortise and inserting a dry tenon is an improvement, but still risks premature joint failure.  Excess glue squeezeout can create dreaded “glue stains” that interfere with staining, but is not caused by brushing glue on all surfaces.  It is caused by applying too much glue.

Third, joints have to be well made.  When edge gluing two boards, those edges need to be flat and straight over their entire lengths.  Mortise and tenon and dovetail joints should be a “friction fit” meaning slight pressure is needed to assembly and disassemble the dry joints.

Fourth, adequate clamping pressure has to be applied in a timely fashion until the adhesive cures. 

When a joint fails prematurely, take a look at the mating surfaces to see if the joint was well made and the mating surfaces show dried glue over the majority of their meeting surfaces.  Do not simply apply more glue and re-assemble without first properly preparing the joint.

Vineyard Table Harp Base

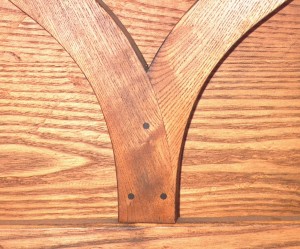
The pivoting harp on this piece made in the style of French provincial vineyard tables is a smoothly flowing curve from top to bottom.  The plan was found in a modern publication, but the half lap joint at the bottom of the harp was simplified into straight lines.  The transition interrupted the flow, and visually was unappealing.

About three hours were required to make and test a curved pattern for the bottom lap joint, but the result was well worth the investment.  The sinuous curve now extends unbroken from top to bottom for each side of the harp.

This small change elevated the resulting table from tolerable to charming, and rewards those who take a closer look.  A picture of the entire table and some details on the genre can be found at www.stephanwoodworking.com/TableDiningVineyard.htm  Additionally there are some pictures of antique vineyard tables in my workshop files I’d be happy to share if you’d like to drop by.

Drawer Slips

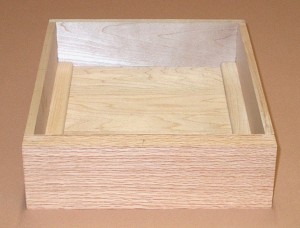
Quadrant drawer slip

Antique furniture drawers always involved wooden drawer sides sliding on wooden runners.  On better furniture, drawers were custom fit to their openings with even, tight gaps.  But with use, the drawer runners and bottoms of the drawer sides would wear  Eventually the wear was so great that there would no longer be even gaps around the drawer front.

 
A solution developed in England and/or France was to glue a second strip of wood to the inside bottom edge of the drawer sides.  This creates a wider bearing surface that wears more slowly.  A second advantage of drawer slips is that the drawer sides could be made more narrow, adding elegance and a sense of lightness to the drawer.  A third advantage is that the inside of the drawer has much more visual interest.  Three types of slips were used, the quadrant pictured here, a cove, and a flush with delicate scratch bead along the drawer bottom.  Sample drawers with quadrant and flush slips are maintained at my workshop if you’d like to see them first-hand.
 
It’s a mystery why furniture makers emigrating from those countries to the United States did not incorporate drawer slips in furniture made here.  I like to include them for all of the stated advantages.
 
More information on drawer slips can be found at www.stephanwoodworking.com/DrawerSlips.htm