Do Your Traditions Include a Family Meal?

“The special things we look forward to as a family and the everyday routines we abide by such as the time we get up, the foods we have for breakfast, the things we do on the weekends, and the activities we are involved in during the week are the threads of life that bind us together as a family [emphasis added].”  Family Traditions, OSU Fact Sheet, Melinda Hill.

With so many activities, events, and distractions, today’s families don’t send as much time together as earlier generations did.  Extra curricular schedules, enrichment programs, social media time, increased work demands and more all chip away at opportunities for the family to engage each other, share successes and challenges, and grow together.

As a family, set a weekly time for an essential family ritual – a sit down meal where the attention and focus is on each other.  Highlight this focal meal’s significance with a unique menu, favorite food or home-made dessert not included in other meals.  Once a month expand the focal meal to include extended family, to keep and grow bridges and bonds across generations and give both seniors and children a greater sense of belonging and support.

Bringing together the members of a newly blended family can be a significant challenge that can take many months of constant work, and the family dining table tradition might need help.  Merging might be assisted by jointly choosing or designing a new family dining table and selecting the day and format for the focal family meal together.  The children collectively could each week select the menu for the following week, or each one could request one item on the menu.  There are many other family-oriented practices that could be used to bring everyone closer.

To make the “family together” focal meal enjoyable and positive, the table needs to meet the physical needs of the family.  “Standard” table sizes may leave elbows and feet too close together, fostering combat rather than harmony.  There may be insufficient room for casseroles and serving dishes, forcing a parent to make repeated trips to the stove. Chips in the finish, loose joints, and other defects should be explained as necessary sacrifices and rather than decreased respect for this fundamental family tradition.

A dining table is a piece of furniture, and should be treated as such.  Spills are unavoidable, but should be wiped up promptly.  Placements are always appropriate, and coasters for glasses suggest that the family’s home focal point is important.  Clear the table at the end of the meal, not at the end of the night, and wipe clean with a damp cloth.

A compilation of dining table design considerations at www.stephanwoodworking.com/DesignGuides.htm provides guidelines that may prove helpful.  When considering a larger table, a piece of cardboard can suggest how well a larger table would fit the room and people walking around it.  In these challenging economic times, estate sales sometimes will include larger, well built dining tables.  When looking at a new table, consider how likely a built-up finish is to chip, or perhaps an oil-varnish blend finish that cannot chip because it does not build up into a film.

A family dining table represents many hundreds or thousands of hours of family interaction and engagement.  When used for years and years, it helps everyone remember the good and bad times that the family worked through and grew strength from, a symbol of the family.  If passed on, it becomes a bridge between generations and helps the next generation lead and nurture their own children.

Why Not Equality for Wood?

Why does an obscuring mask of dirt and grime increase the value of old furniture but decrease the value of old paintings? Is it curious to anyone else that appraisers always recommend cleaning paintings and jewelry, even rugs, so that we can enjoy the detail; but want to see the same dirt, cigarette smoke, and general grudge left on beautiful wood? 

The beauty of wood furniture and gifts is a combination of several ingredients:  the overall design – combination of straight lines and curves, shapes and proportions; woodworking – joinery used, execution skill; and artistry – the wood’s color, grain pattern, character and figure created by Nature, how the grain patterns are used, how the boards are sequenced and combined, and sometimes how different woods are combined.  A mask of dirt and grime obscure both the woodworking and the artistry.

An admired painting invites closer attention to details – how the major components are spatially arranged, how each component interacts with the others, the amount of detail used for each component, how colors and brush strokes are layered, and so on.  The effect is to draw your attention to finer and finer detail, and each time you do so you are rewarded visually and emotionally.  When new, antique furniture offered the same ongoing pleasure for its owner. 

Some boards have little or no character – use them for the bottom and back.  Others have strong oval and arch grain patterns that would visually detract from interplay of components and overall design, or from the style - again, use them only in appropriate styles and then in visual balance.  When one looks below the dirt and grime on magnificient antiques, we’ll see those were the practices of the skilled craftspeople who built them.

Perhaps someday it will be possible to clean furniture, as one would clean a dirty painting, without losing most of its appraised value.


Is it Beauty or Blotch?

When a dye, pigment stain or oil is wiped onto raw hardwood, the wood can develop an uneven color.

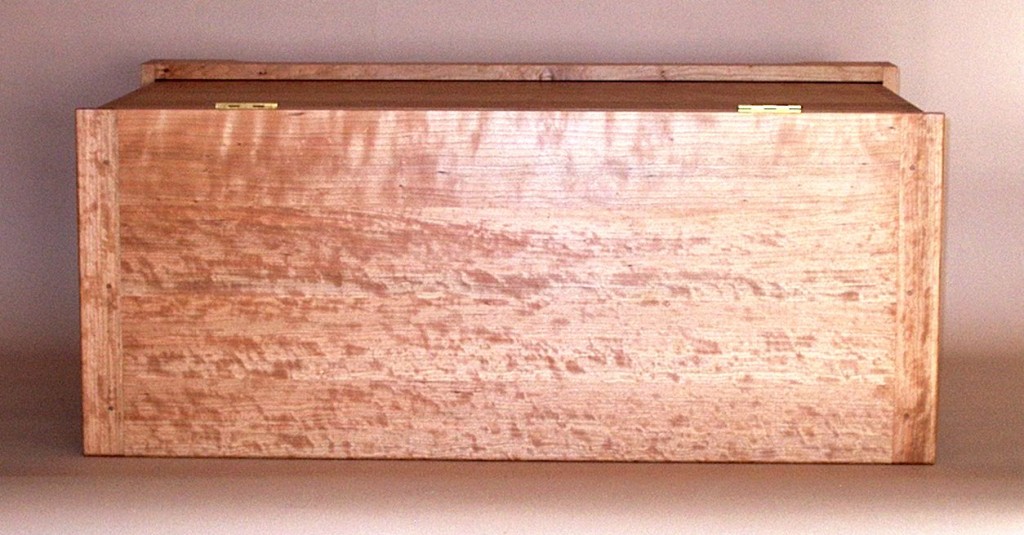
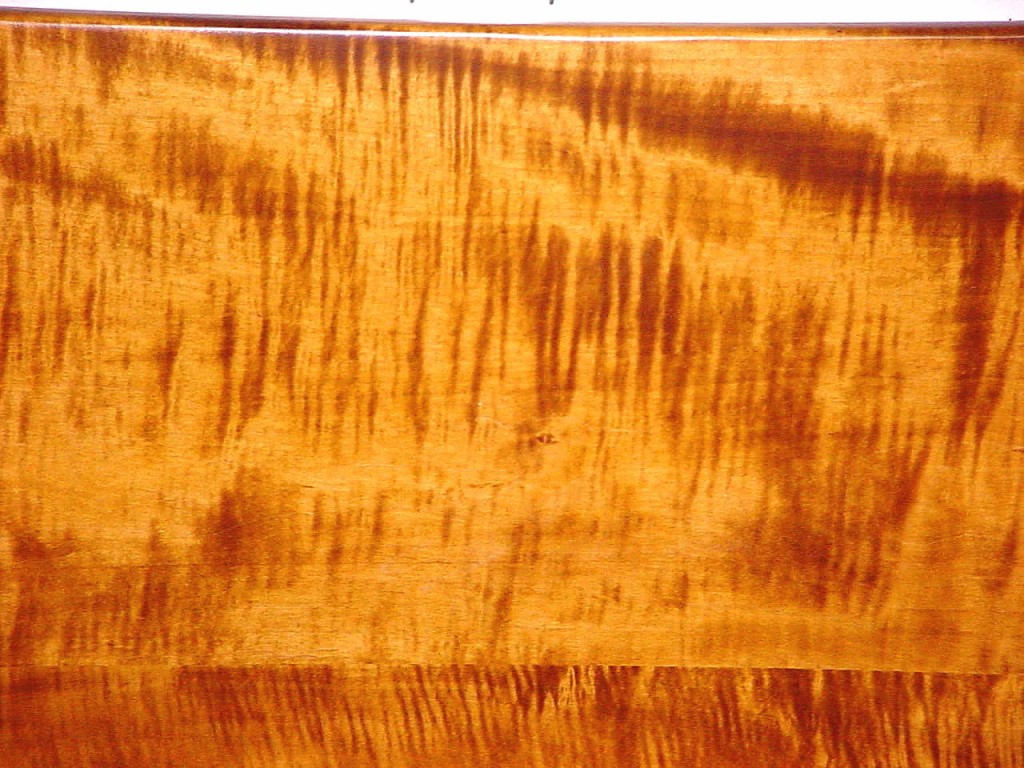
Many people would find this picture of maple, found on the Internet, to be stunningly beautiful.  The displayed figure is known as curly, tiger or fiddleback.  (It’s not known, and really not important, if the picture shows solid wood or maple plywood.)

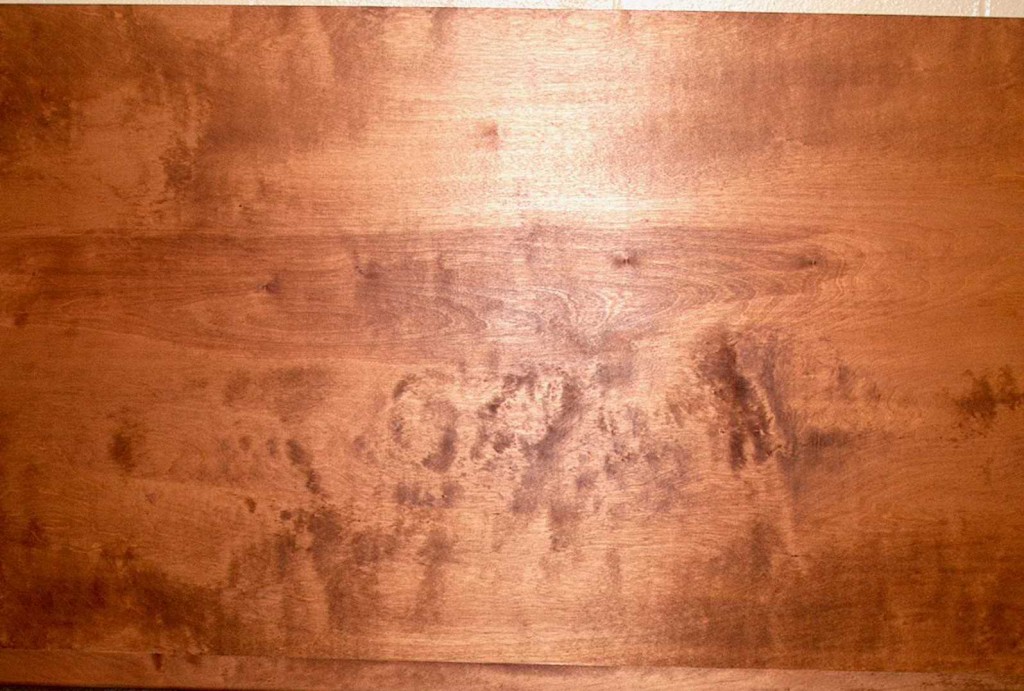
Like the above maple, this birch plywood shows lighter and darker areas (in addition to the band of darker heartwood in the middle of the picture).   This figure is known as blotch.  (After a water based dye was wiped on and dried, three coats of an oil-varnish blend were wiped on.)

Like many hardwoods, maple can show blotchy figure, and birch can show curly figure, both as solid wood and as the surface veneer of hardwood plywood.

In both pictures, the light and dark areas are due to the wood’s having an uneven rate of absorption – the darker areas absorb more color and/or oil.  Although they were probably different in these two pictures, it is possible that a similar sequence of color and finishing steps were applied to the maple and birch.

When the uneven rate of absorption is very regular, as in the first picture, many will say the finisher was especially skilled.  When the uneven rate of absorption is irregular, as in the second picture, some will say the finisher was unskilled.  Both pictures show the natural response of hardwood to wiped color and/or oil.


A Favorite Piece

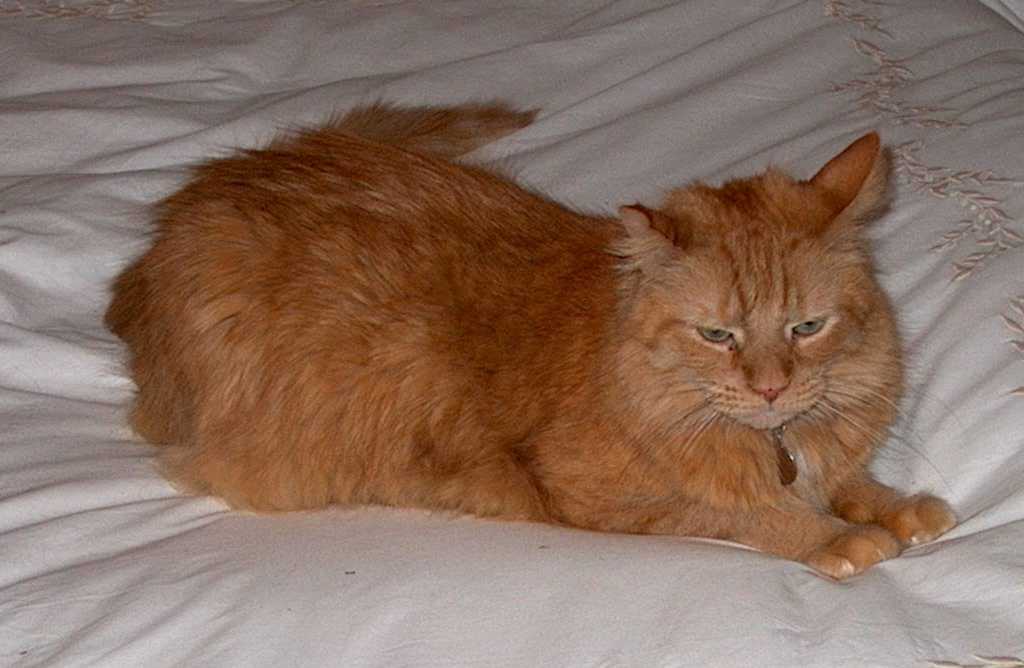
My wife and I love our two cats in part because they are constantly showing new and old character traits.

(Yes, this is only one of the two – have you recently tried to herd cats?)

New meows, new ways of playing with their toys, new places to be scratched, odd sleeping postures – all invite and reward our attention and interest.  But we wouldn’t get more enjoyment from having twenty cats – too much quantity to allow quality interaction.

Like a beloved spouse or favorite pet, a treasured piece of furniture also can continuously reward closer inspection and interaction.  It might be figure that becomes more noticeable in winter sunlight, chatoyance (changing luster) we hadn’t observed closely before, or a scratch bead or drawer slip hidden inside.

In an office or home, most of our furniture blends together, as would too many pets.  But hopefully we each have one treasured piece that has special meaning, because it was passed along with family memories, was a special gift or purchase, or matches goals and aspirations.  A treasured piece doesn’t have to be large or outrageously expensive, but all should have one, to add comfort and character to your personal refuge from life’s trials and tribulations.

Next time you walk by your treasured piece, stop for a few moments to discover or revisit and enjoy one of its marvelous details.

Mother’s Chair Came Apart

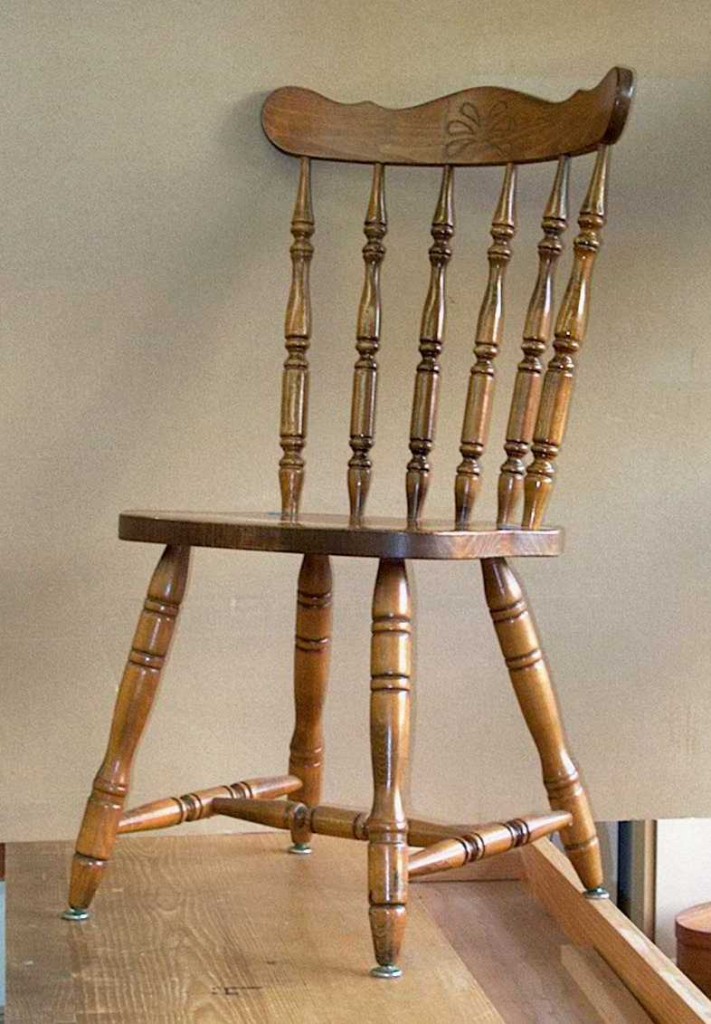
This chair came from my mother’s apartment when she moved to a senior living center.  Its joints were loose when she had it, and kept coming apart when I lifted it injudiciously.  Although I build new  rather than repair repair old furniture, yesterday I decided to investigate.  It is comfortable at my computer desk and I hope to continue using it for several years,

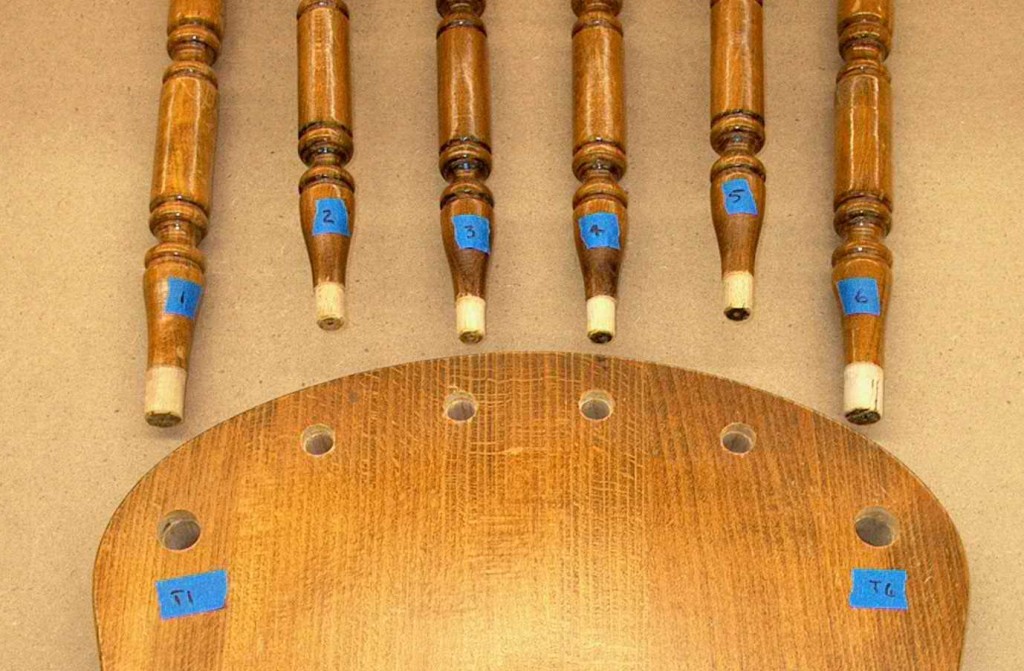
After carefully labelling everything. I began to disassemble loose joints.  All but seven of the twenty-two joints came apart.  The above picture shows the drilled holes, called mortises, in the top of the chair seat and the light colored tenons at the bottoms of the chair back spindles.

Examining these and the disassembled joints below the chair seat, it became obvious that the joints were “glued” by squirting glue into the bottoms of the mortises and then inserting the tenons.  The rationale may have been that glue would be forced up around the sides of the mortises and tenons, but that happened only a few of the fifteen disassembled joints, and even there only on a portion of the surface area of those joints.

Regardless of the glue used, for the strongest possible joint the adhesive must be worked onto all joint surfaces.  Spreading glue simply by bringing together the parts of a mortise and tenon joint does not work the glue onto the entire area of matching surfaces, so the joint has diminished strength.  (In an article a year or two ago Popular Woodworking magazine clearly demonstrated this using a rectangular motise and tenon joint, where one side of the mortise was clear plastic.)

It is widely recognized that glue does not bond well to end grain.  For the majority of the disassembled joints in this chair, the only glue contact with the tenons was on their ends, which of course is end grain.

Finally, the excess space at the bottom of a mortise is designed to provide space for any glue forced to the bottom when the tenon is inserted, and should not be filled with glue.  In the procedure used on this chair (and others I have seen) all of the glue is first squirted into the bottom of the mortise.  When the tenon is inserted this filled well creates hydraulic pressure resisting full insertion of the tenon, and perhaps permanently holding the tenon slightly proud.

Although the parts of mother’s chair were machined well and attractively finished, failure of the joinery was guaranteed due to the poor glue application.  Gently used, and with finish contributing some additional slight joint strength, such chairs might last a year or two, but the joints will fail.

Effective chair repair requires proper adhesive, tools and experience.  Simply squeezing some more glue around an exposed joint and pushing it home won’t make a lasting repair, and will make effective repair more difficult and expensive.

If you have a wobbly chair you want repaired, perform diligent research by soliciting referrals from friends, interviewing repair businesses, and getting estimates.  Expect to pay at least $100 for re-gluing the most basic chairs, more for chairs such as this one with extra joints.  If the chair has upholstery attached to the chair itself (rather than a seat insert) the upholstery will have to be replaced after re-gluing.

Factory-made chairs can be unbelievable bargains in the store, but re-gluing or replacement should be part of the purchase calculation.  For any set of new chairs, one might want to plan for replacement or re-gluing of at least one chair every year.  If subjected to stronger use, the time period should be six months.  Effectively re-glued and not abused, the chair should provide many years of service.

Please let me know of other topics you would like to see covered in future posts.

It’s All In The Thumb

Single boards are almost never wide enough for even relatively narrow applications such as door panels, nightstand sides or headboards.  Thick glue lines are usually areas of weakness because most glues lack internal strength.  Thick glue joints also form noticeable straight lines that detract visually from the appearance of furniture.

The board edges left by machine jointers are pretty good, and are used without improvement in factory production.  Slight changes in pressure and speed as the board is feed through the jointer causes dips in the edge, as will bits of sawdust thrown onto the jointer table by the machine.  These dips result in areas of thicker glue lines.

Woodworking craftsmen of earlier times always dressed the machine-produced edge with a long hand plane to further refine it.  Even with today’s improved machine jointers, my experience is that several passes with a jointer hand plane are always needed before a full length shaving is obtained.

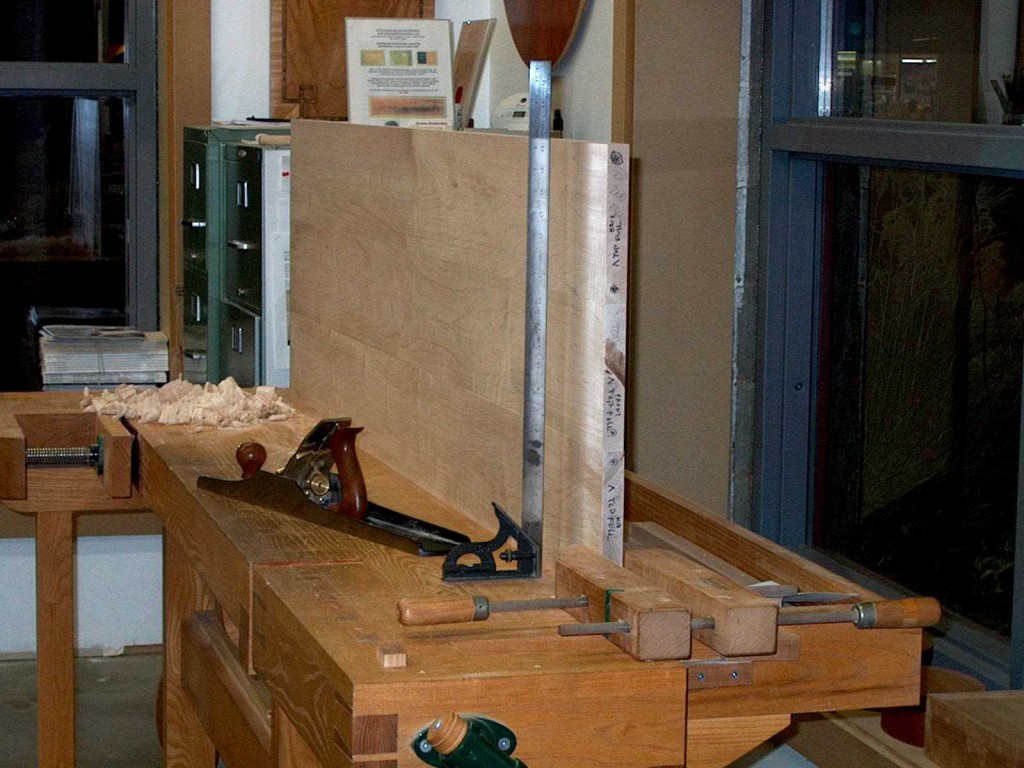
After hand plane jointing, I always check that the edges are still perpendicular to the board faces.  Sometimes I’ve found that hand planing introduced a slight change from a 90 degree angle, too slight to see with a T square but noticeable when the boards are dry stacked as in the above picture.

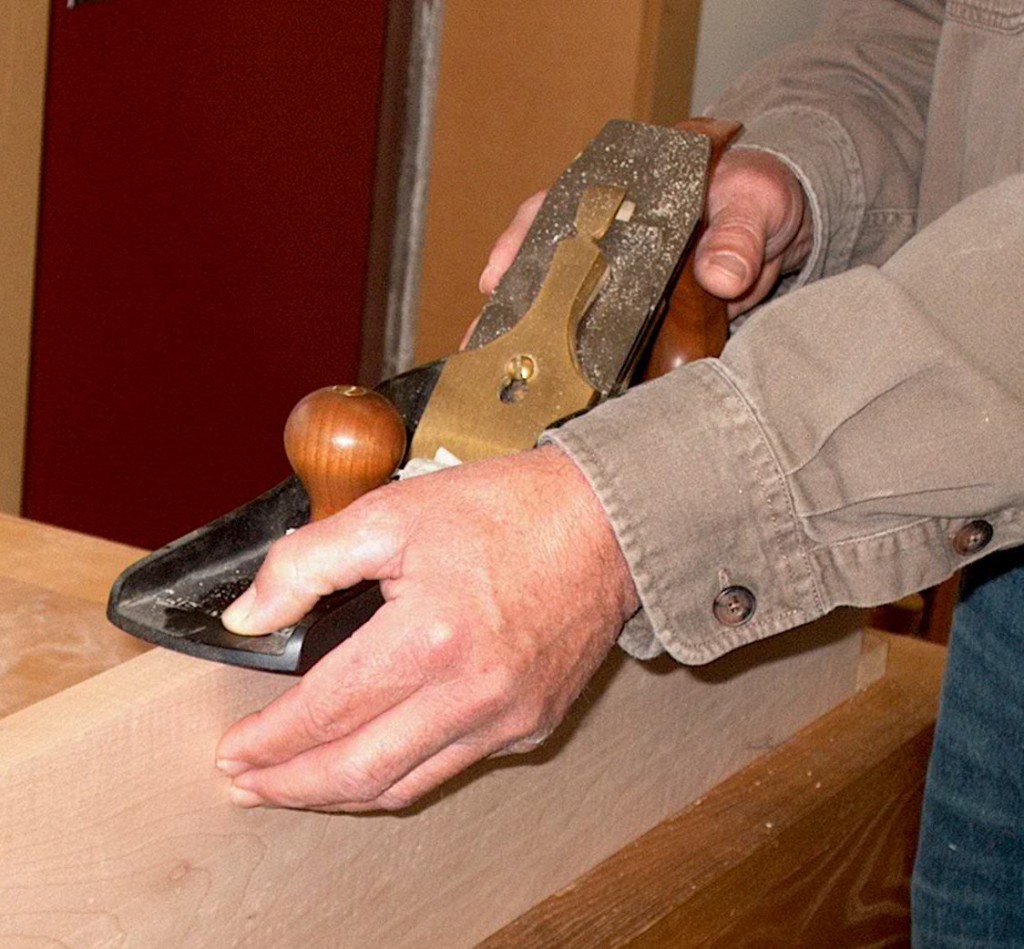
A call to Lie Nielsen, the hand plane manufacturer, suggested I pay attention to the position and pressure applied by my thumb at the toe of the jointer plane.

In this picture, my thumb is over the left corner of the edge.  The shaving will be slightly thicker under my thumb..
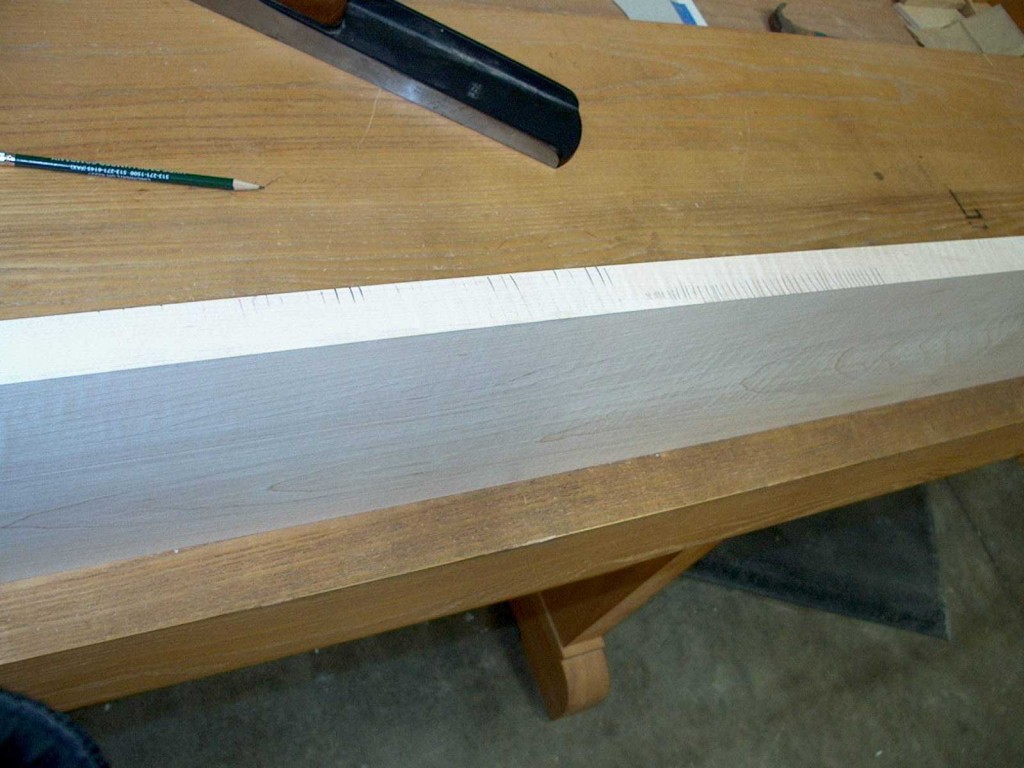
Pencil lines were drawn across the edge before a shaving was taken, moving the plane from right to left..  In about the middle of the picture, I moved my thumb from the right side of the plane’s toe to the left side.  While faint, pencil lines remain along the left corner of right half of the board, and along the right corner of the left half of the board, showing how the shaving was effected by nothing more than moving my thumb. 
While this may sound like much ado about nothing, when done properly refining the edge with a jointer plane takes only a minute.  Eliminating a glue line may contribute to a piece of furniture becoming a family treasure that is kept for decades.  And working to one’s best is a never ending quest to better understand and practice essential skills.

Improving Board Matches

(Part 3 of 3)  The final step in board matching is trimming edges for an even better match.

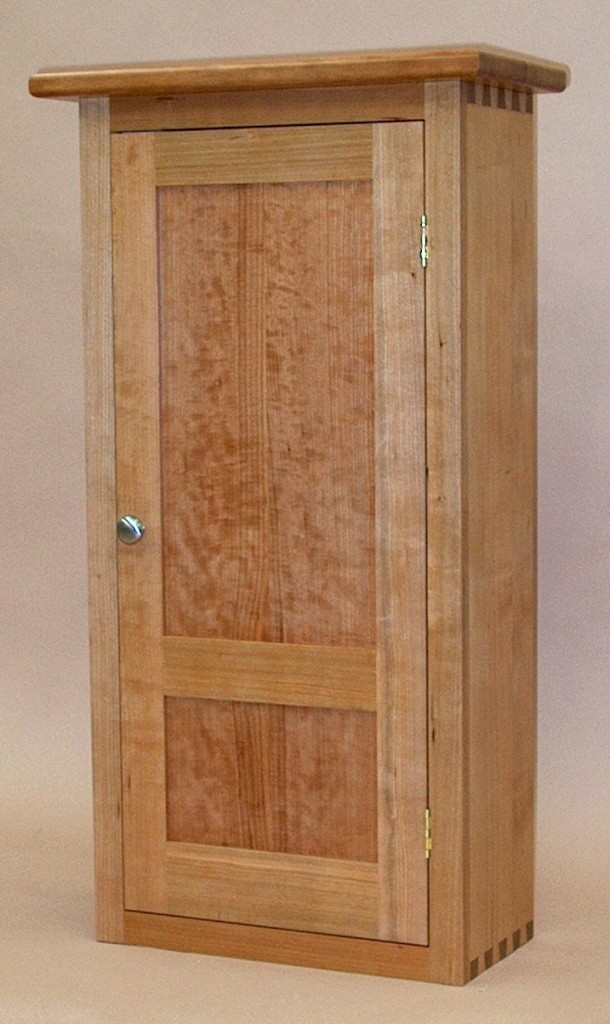
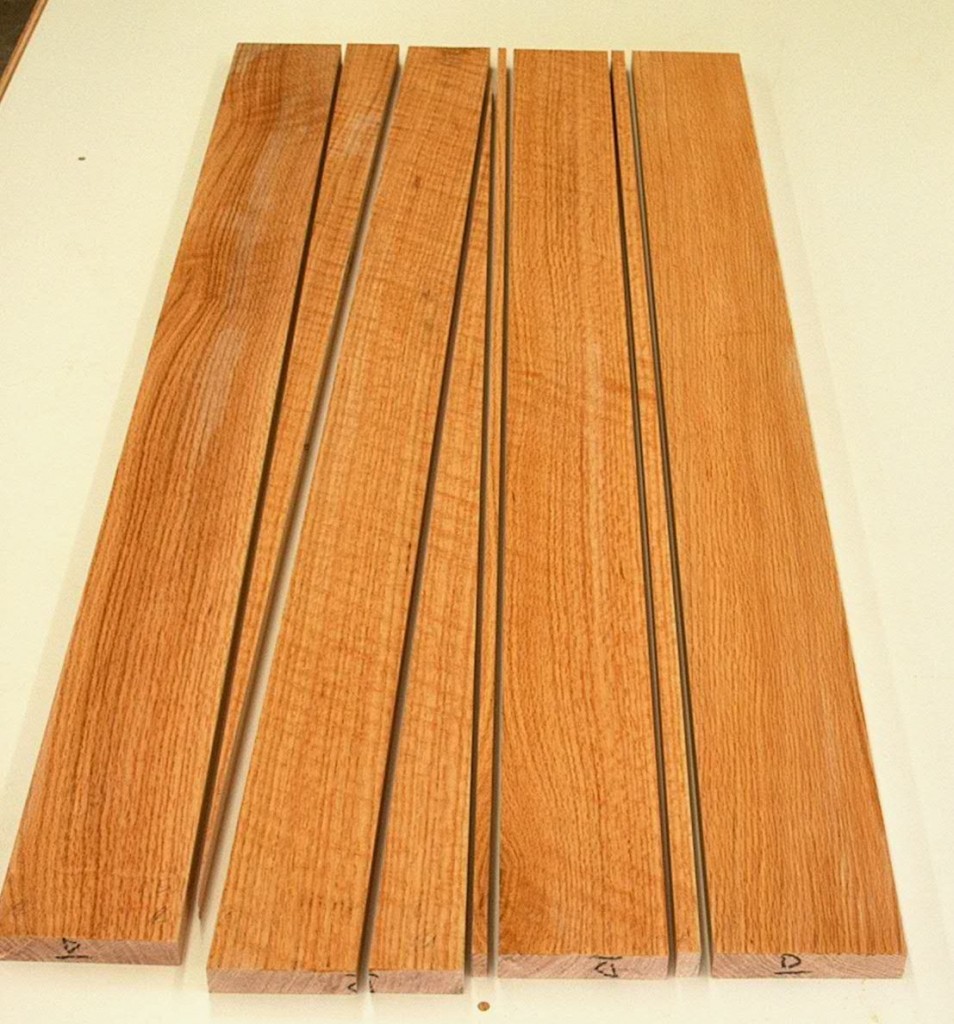
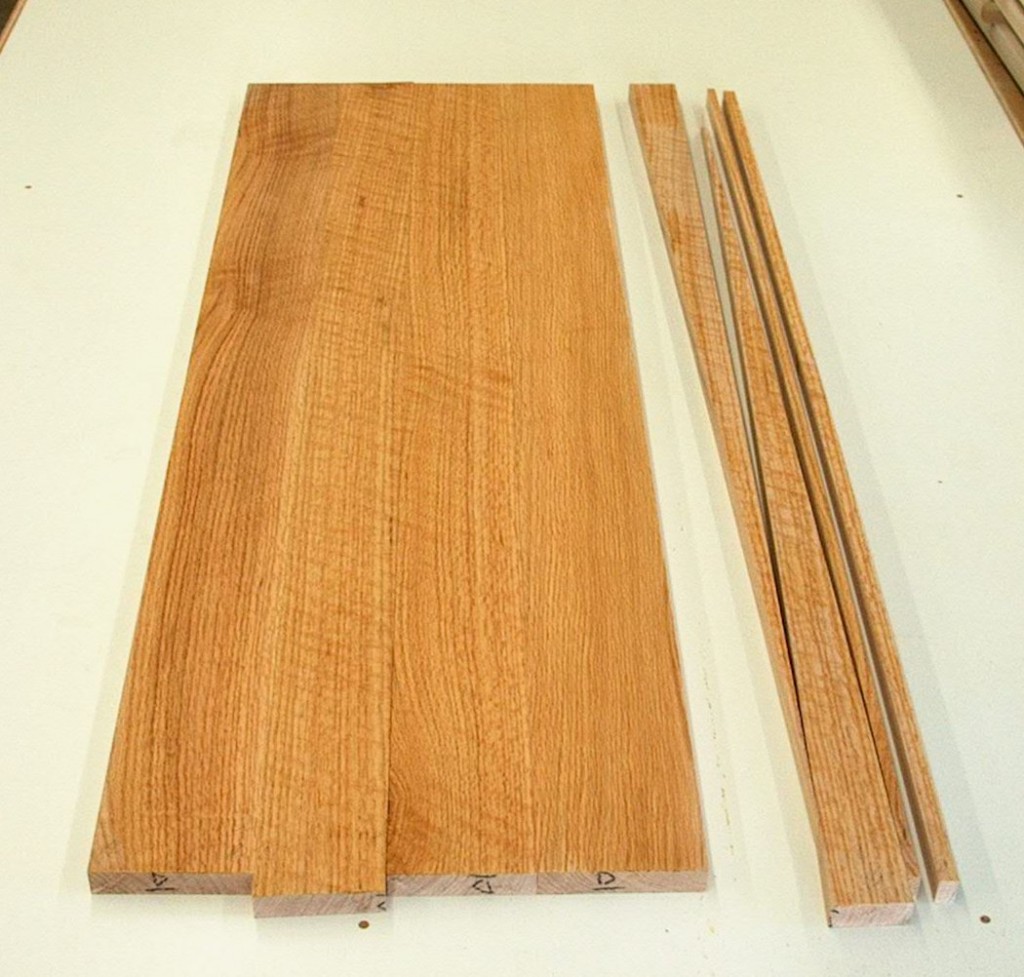
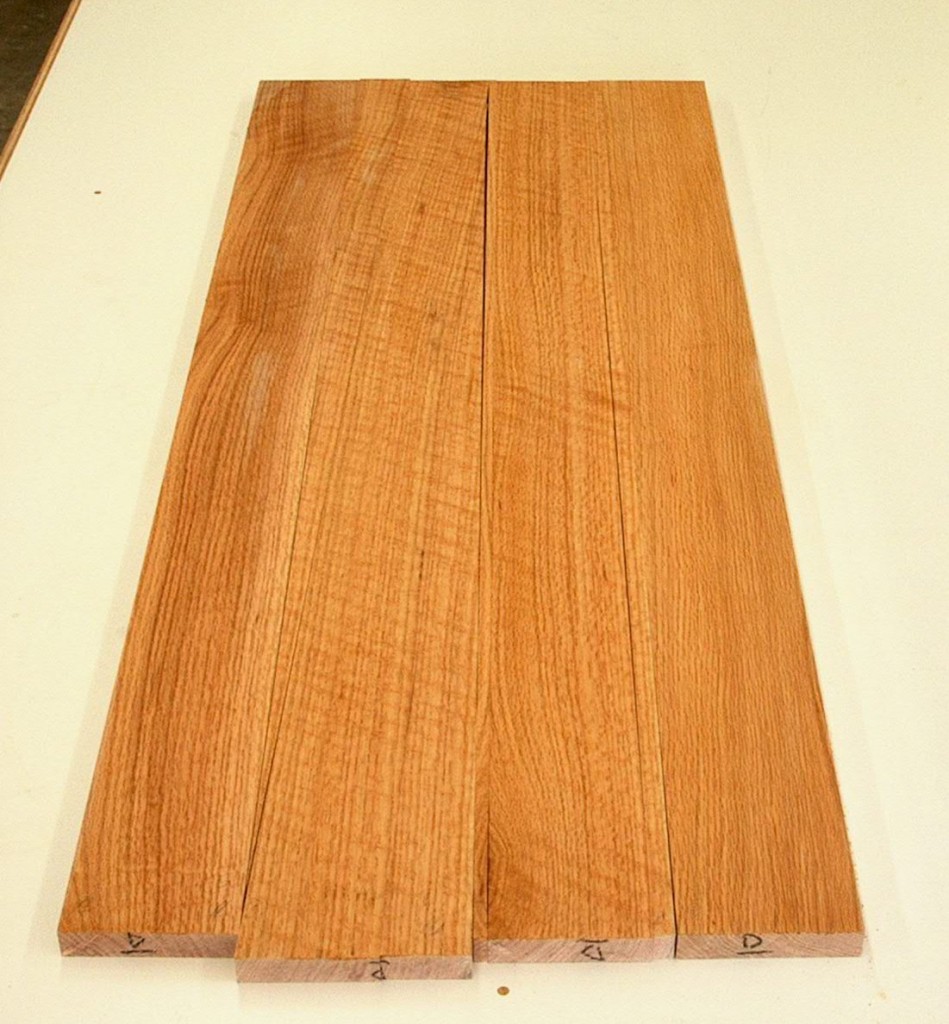
Here are four boards in selected orientation for a specialty cabinet side.  Color and grain pattern flow across the four  boards, but the overall appearance can be improved with five minutes of work.  On the right edge of the 2nd board from the right, there is a strip of sapwood that will stand out after finishing.  On the left edge of the 2nd board is a small defect on the back side.  And the grain pattern on the 3rd board from the right is diagonal to the edges, making more visible the joint with the adjoining boards.

Those trims have been made.

With the trimmings removed, the resulting matches between boards are improved.  The eye now sees the grain and fiigure of the wood without being distracted by joints.  It is hoped that with this attention to detail the piece of furniture is more likely to be used and enjoyed for many many years.

Poor Board Matches

(Part 2 of 3)  As a wood lover, I would hope all furniture to be kept and enjoyed for years if not decades.  All too often, furniture is replaced before the end of its useful life.  A visit to a local resale/antique store found some pieces of furniture with perhaps less than ideal board matches.

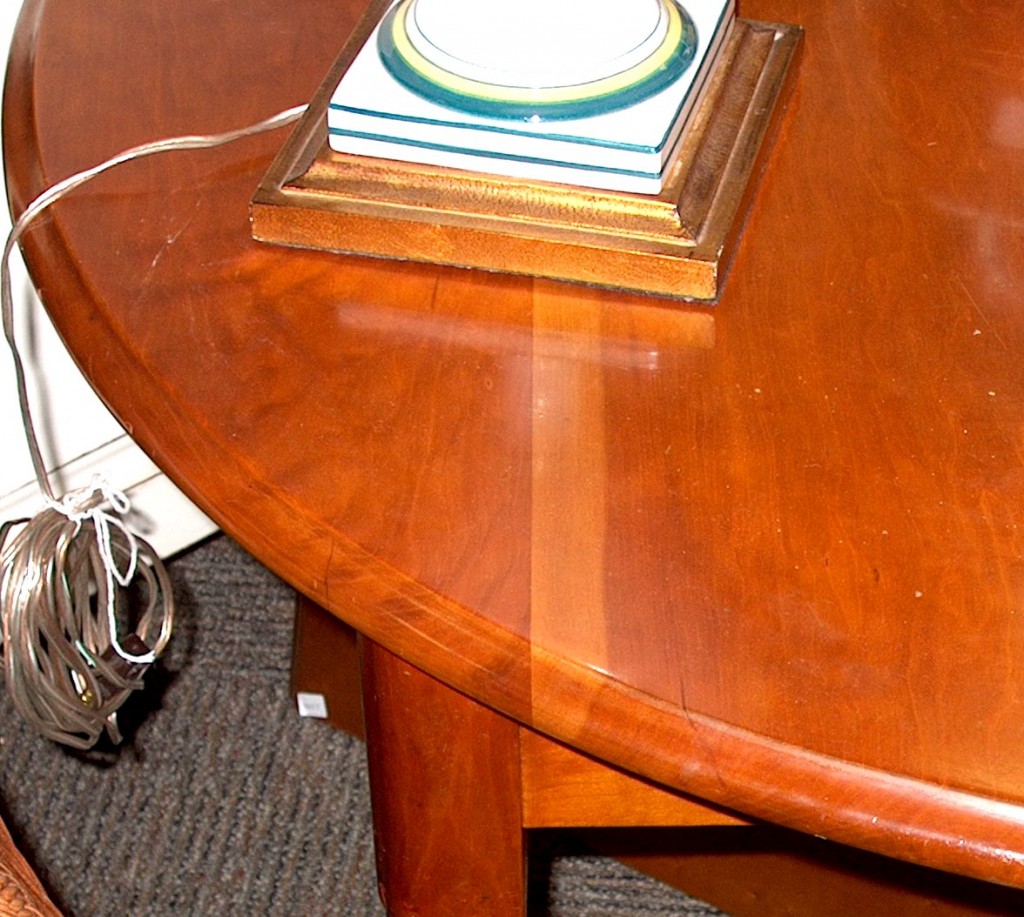
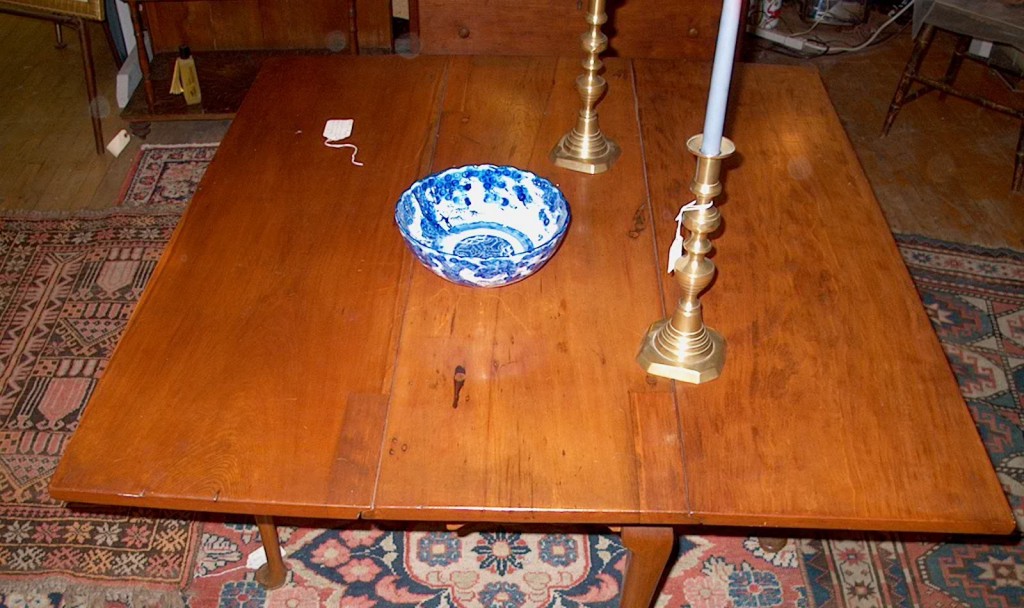
 This table, which showed almost no signs of use, had a strip of sapwood along the edge of just one of the boards in the top.

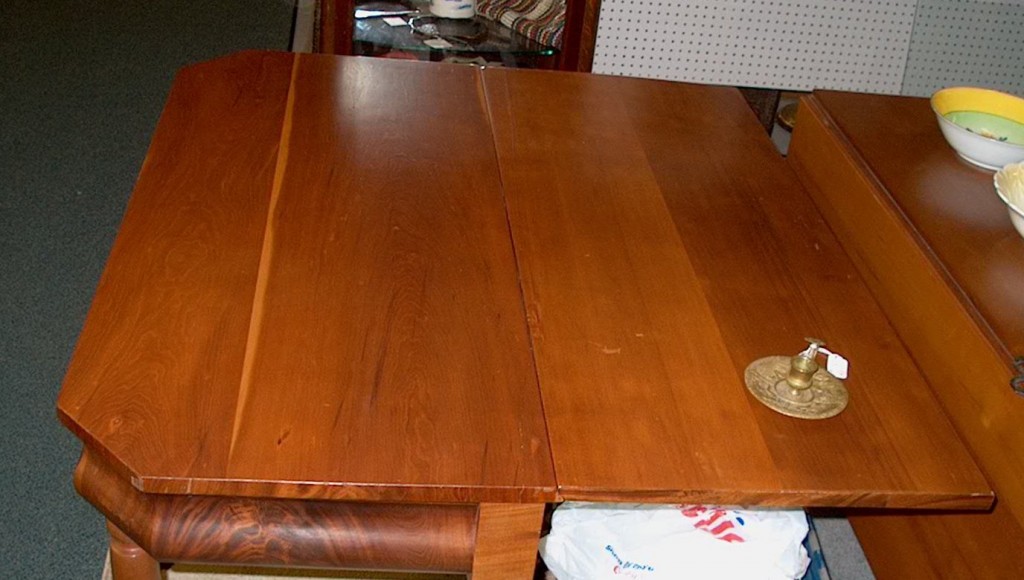
This older table has a full length strip of sapwood and a short one along the edges of one of the boards.  The sapwood is not used artistically, and is simply distracting.

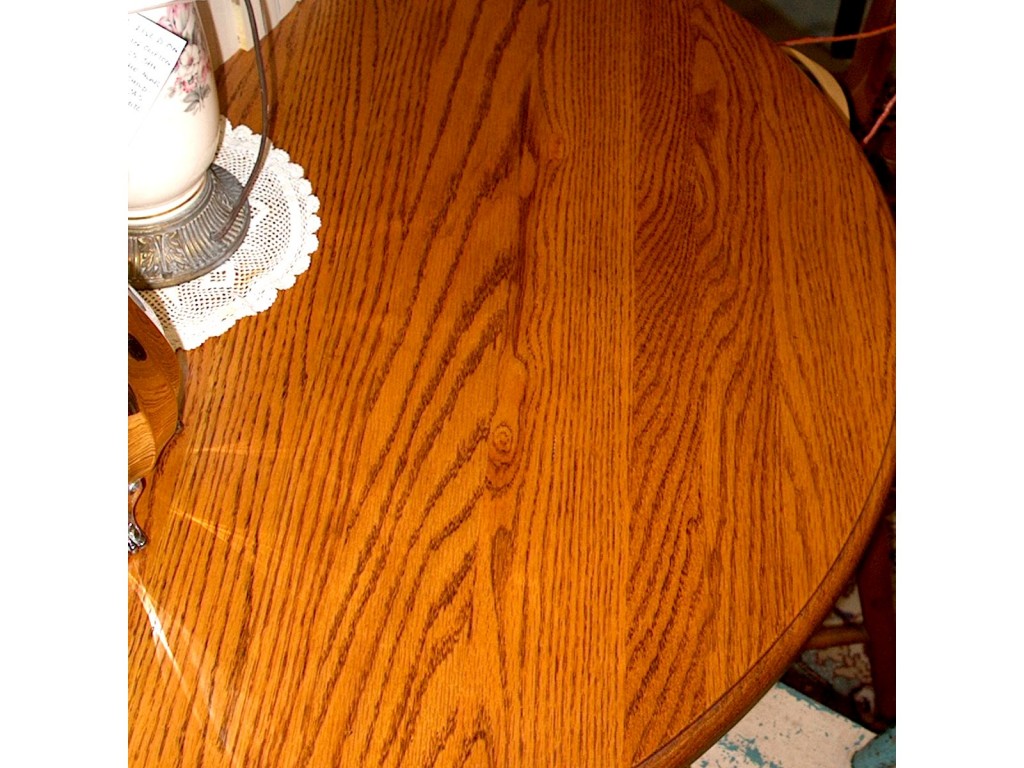
This table has a very disorienting collection of brain patterns and directions.  It is not surprising the table shows no wear.

Finally, here’s an older table with three very different boards.  The left one is very uniform, the middle one shows some character, and the right one has wonderful figure.  None of the three match any of the others, which it is suggested makes the table less pleasing in time.

People develop levels of attachment to items they own, including furniture.  These attachments can have visual, emotional, functional, and financial components.  The stronger the attachments, the more satisfying is ownership.  Good board matching assists strong visual attachment, while repeated viewing of poor board matches may foster disappointment, frustration, and early replacement, decreasing economic value to the owner.

Matching Boards in Furniture

(Part 1 of 3)  It is always extremely rewarding when visitors ask how many boards are in the field on this cherry blanket chest top.  Unless creating a decorative effect such as a bookmatch, my objective is to minimize changes in color, grain pattern, grain direction and figure at joints.  Ideally, the viewer’s eye is drawn instead to highlights such as dovetailed corners and to the overall style of and proportion of the piece.  (There are two breadboard ends and four boards in the contained field.)

Good matches seldom happen by accident.  But only a few minutes are needed to evaluate alternative orientations and select the best.

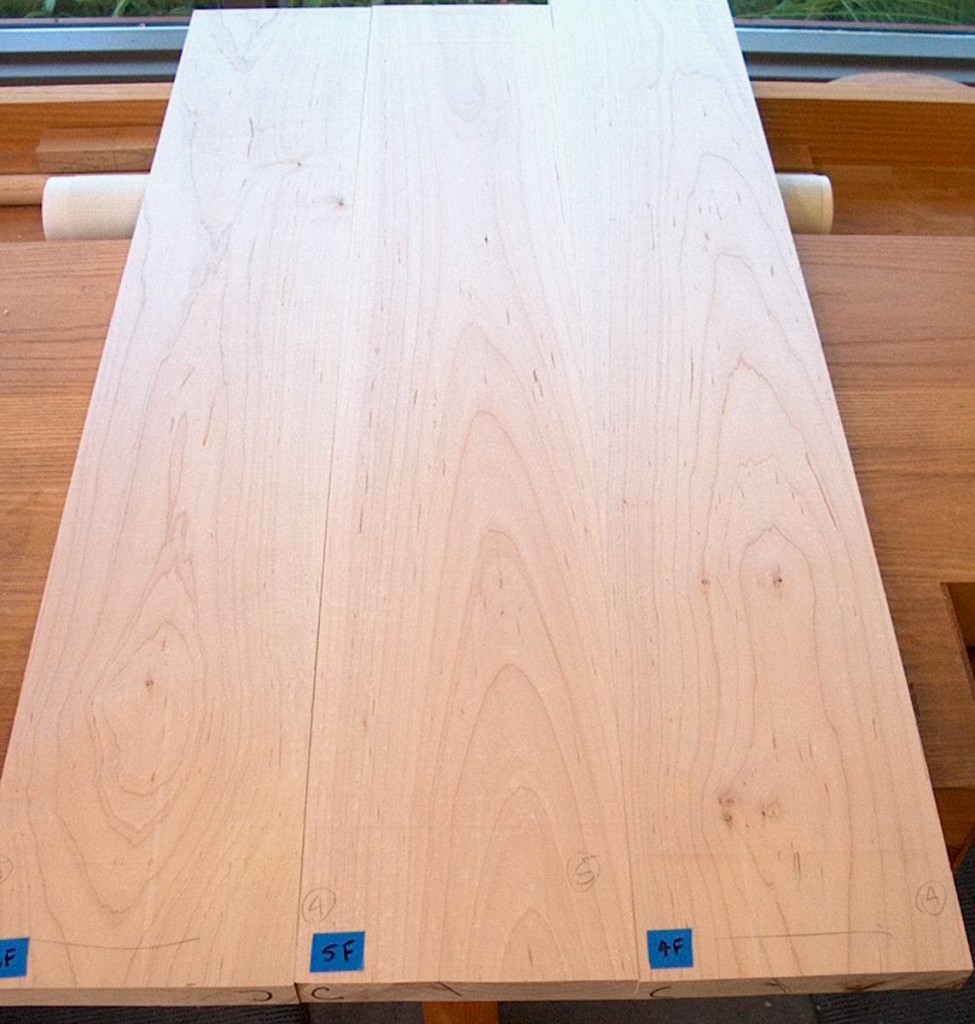
These three all white hard maple boards were selected for the bottom of a sideboard.  In this orientation, rejected, the oval-and-arch patterns in the outer boards are too close to what will be the edges of the glued assembly.

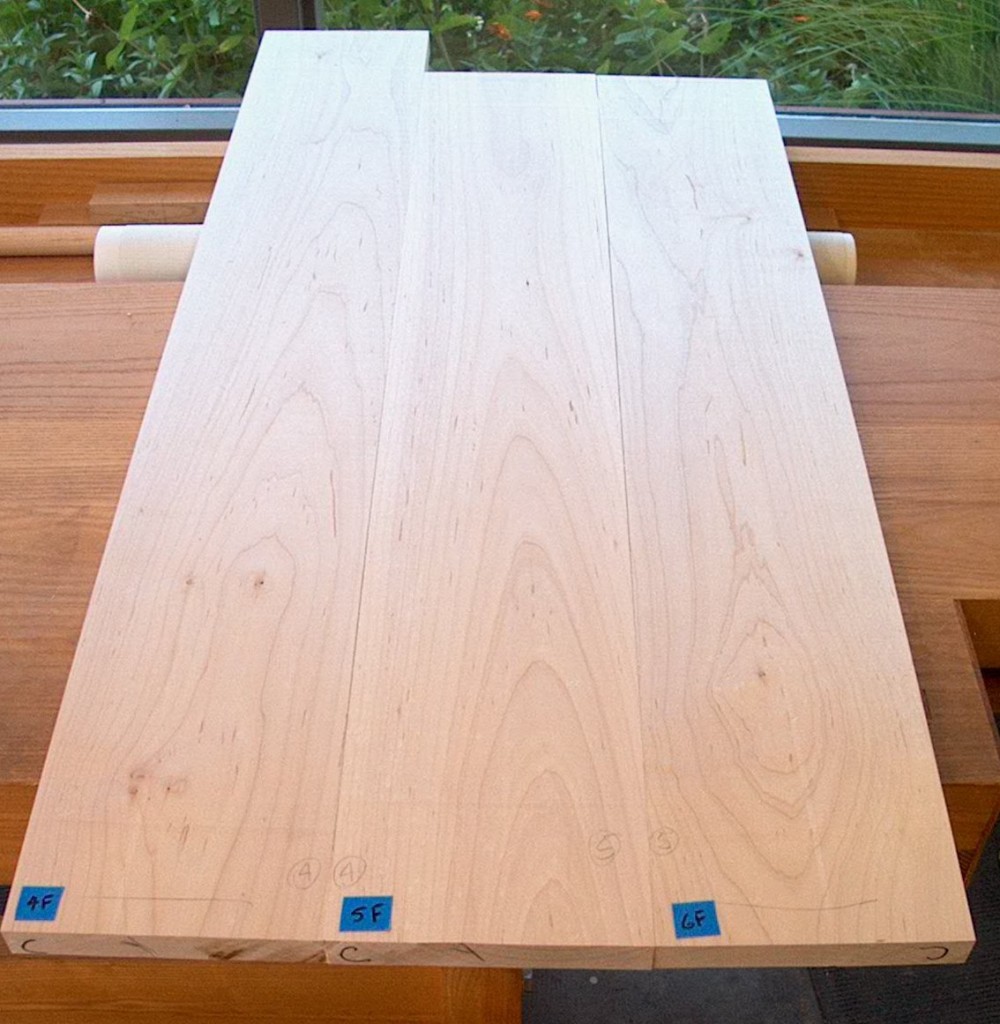
By simply swapping the first and third boards, a much more balanced appearance results.


Spurtles!

(Revised 30 September 2011)

Although I did turn a lightpost this summer for a customer, my lathe has gotten too little use.  So I’ve begun making treen or treenware – small domestic wooden items – on the lathe.

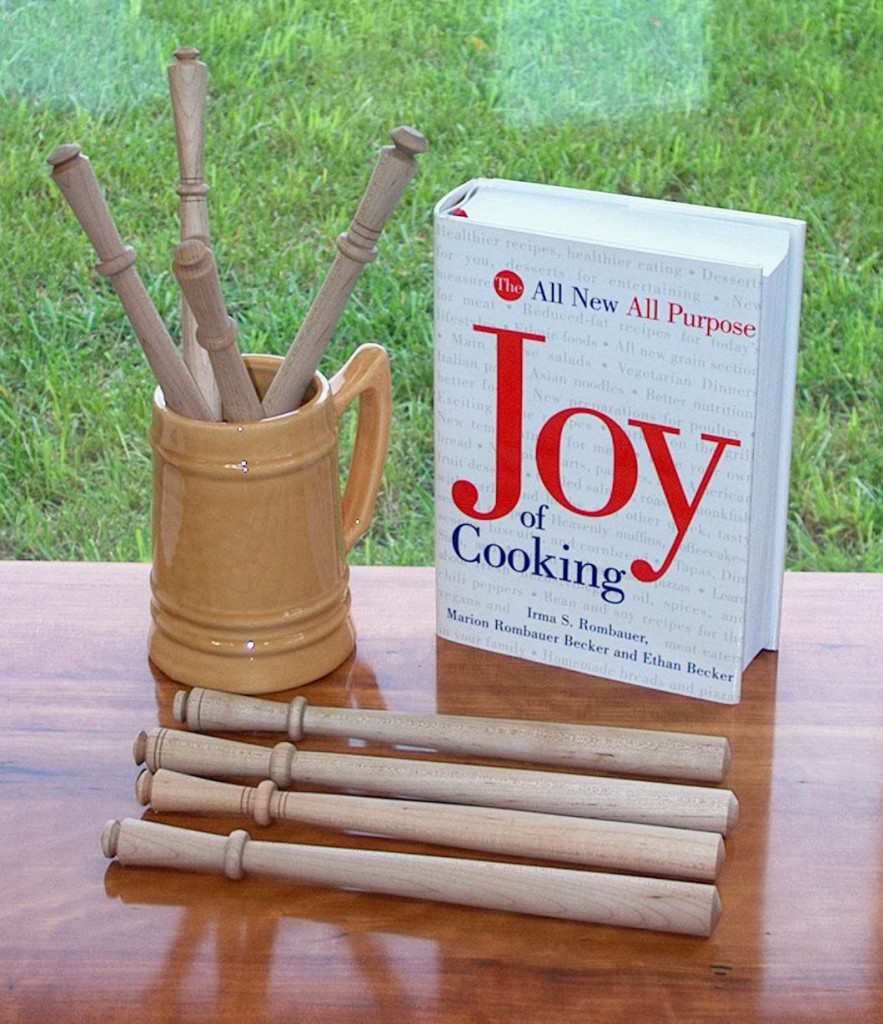
Spurtles were perhaps introduced to the general public by Richard Raffan, a well known Australian turner.  I’ve always thought they were an interesting project, and well suited to these challenging economic times when eating out is more of a luxury.  Instead,  make kitchen time more rewarding by trying new recipies and using fine handcrafted woodenware to elevate the practice of food preparation.  Home made soups, sauces and puddings can be more fun when stirred with a handcrafted spurtle rather than a plastic spoon!

Spurtles are perhaps best known historically as a common kitchen item in Scotland for constant stirring of porridge (oatmeal in North America), so that it did not become lumpy.  2011 is the eighteenth year for an annual porridge-making contest in Carrbridge, Scotland, with entrants from around the world.  The traditional category uses pinhead oatmeal, salt and water; the specialty category allows contestants to get very creative.  Competition is always spirited for the annual Golden Spurtle award.  Details are at www.goldenspurtle.com 

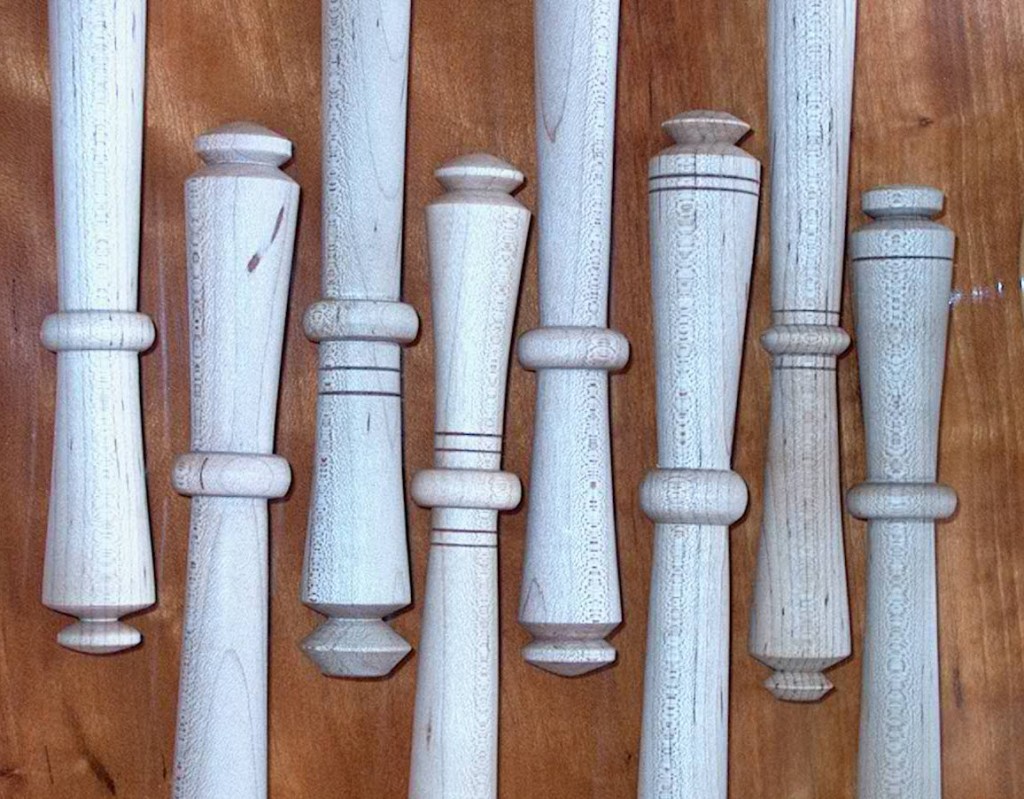
At about 10 1/2″ long, these spurtles make efficient use of what might otherwise be scrap wood.  These were made from short offcuts of what will be a sideboard for a repeat customer.  Relatively long and thin, spurtles are an excellent item for developing proficiency with the skew chisel.

My design is not original but that shown by Mr. Raffan in his 1991 Turning Projects video.  It works so well, it doesn’t seem likely it could be improved.  The cuff nestles just below the fold between thumb and first finger, the narrowing helps keep it there, and the wide base more effectively swirls liquid than a thin one would.  Overall, the spurtle is quite comfortable to hold and use.

These spurtles were turned from select all white hard maple so they can stand up to regular use.  But being wood, normal use should not damage pots and pans.  For safe use in the kitchen, they were wiped with pure mineral oil.  Hand washing would be recommended, with re-coating with mineral oil as needed.