Antique Weather Vane Stand

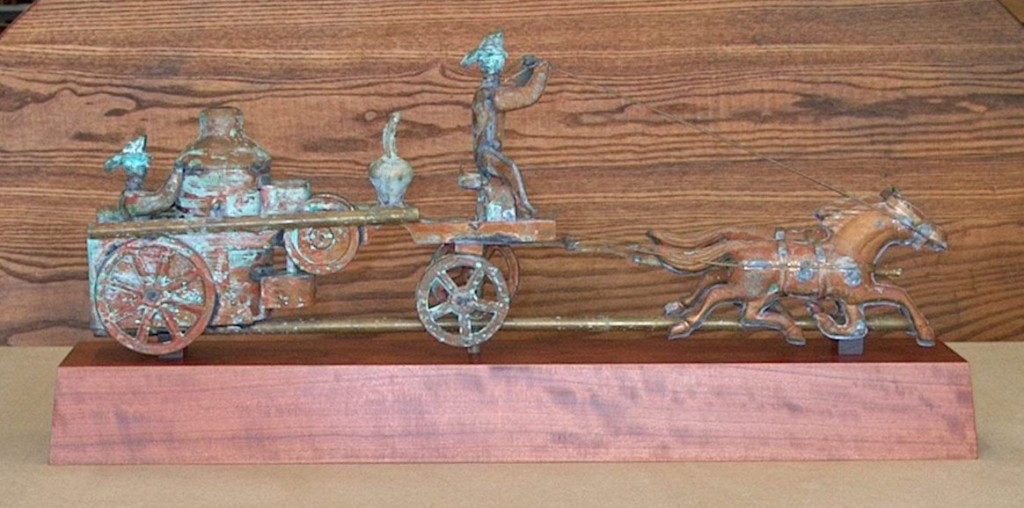
A very interesting challenge began a few weeks ago when a gentleman carrying a large box entered the workshop.  He was carrying a newly purchased antique weather vane and wanted to make the weather vane a noteworthy office addition to be seen by clients and co-workers.  A stand should present and complement artwork and collectibles without competing for attention, and that was our goal.

After exploring some wood choices, quartersawn cherry seemed a perfect complement to the aged copper, and it was fortunate I had a suitable board on hand.
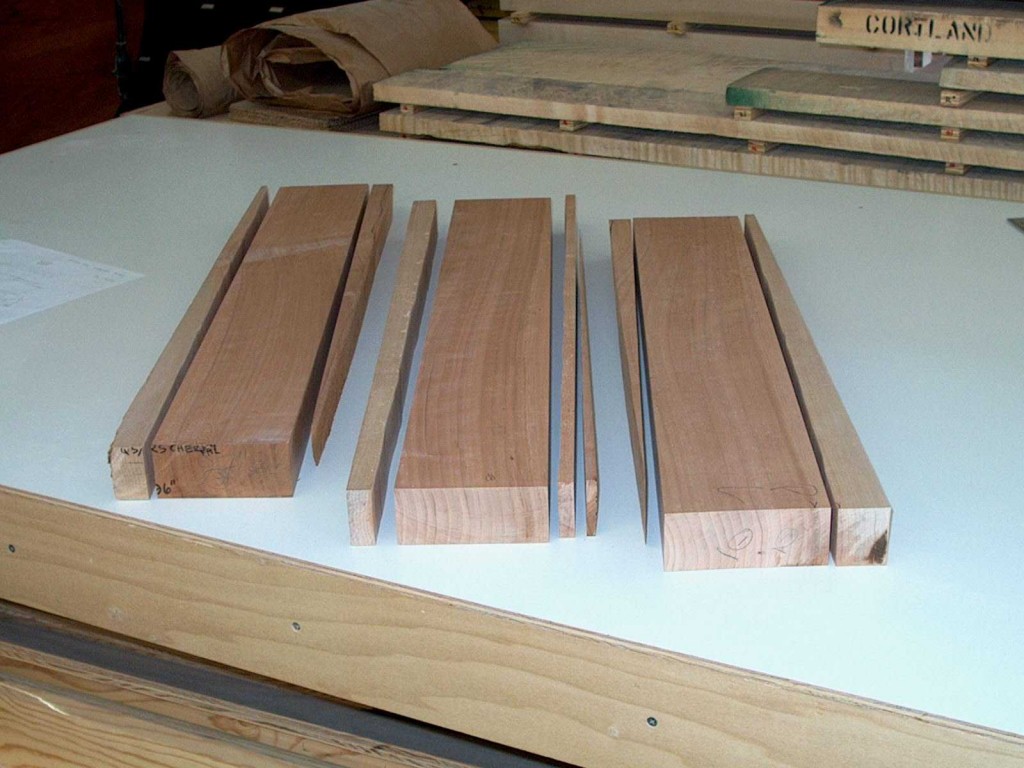
The board was crosscut into three pieces, and each then was trimmed to align the grain direction with the edges. 
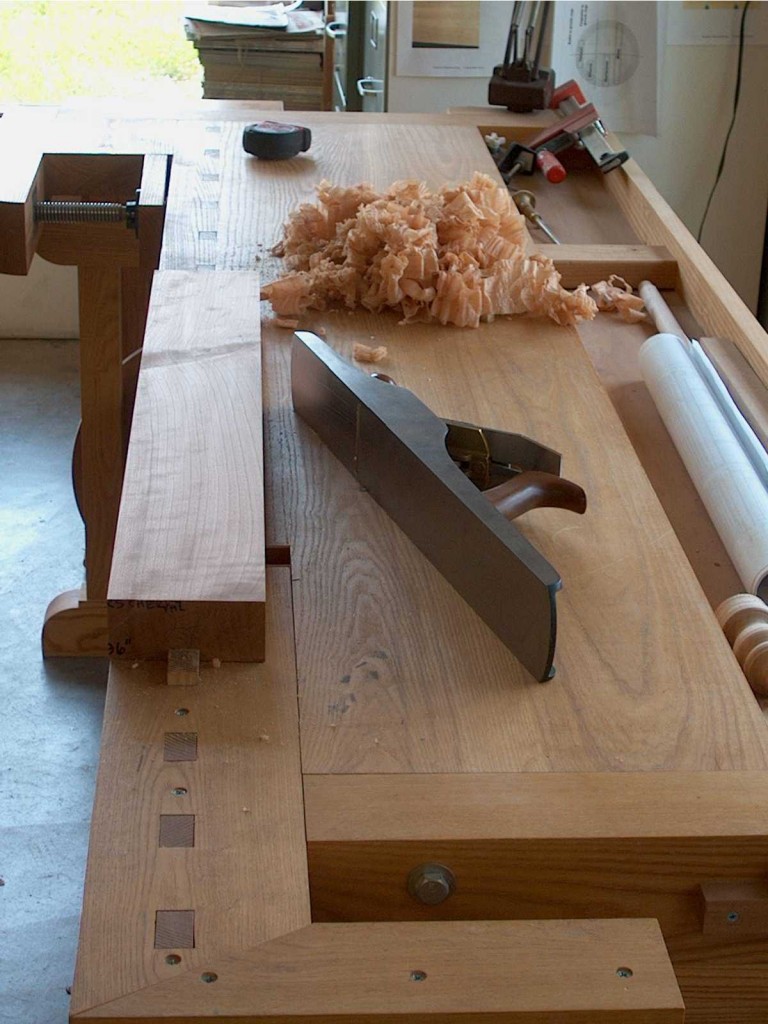
After flattening and straightening the surfaces on machines, the faces were refined with a jointer plane so eventual glue lines would be as tight and unnoticeable as possible.

The weather vane has a central almost vertical rod, for which the stand had to be drilled.  This rod was angled slightly, both left to right and front to back.  Tapered wedges were used with a test block to find that compound angle at the drill press.  The drilled hole had to be slightly oversize so the rod could be inserted, but this would allow the stand to lean slightly.  Front-to-back slight leaning would not be noticeable, but left-to-right would stand out.  Small cherry alignment blocks were planned to address this issue, to be hidden behind the horses’ hooves and the pumper’s large rear wheel.  They work perfectly, and are not noticeable unless pointed out.

A reddish brown dye deepened the color of the stand without obscuring the wood the way pigment stain can.  Three coats of an oil-varnish blend highlighted the character and figure of the wood and provided protection without masking the wonderful tactile stimulation of wood.  As the cherry develops its natural aged patina, the stand will even more successfully present and complement the weather vane.  This small project was immensely satisfying and a pleasure to complete.

Glues and Gluing

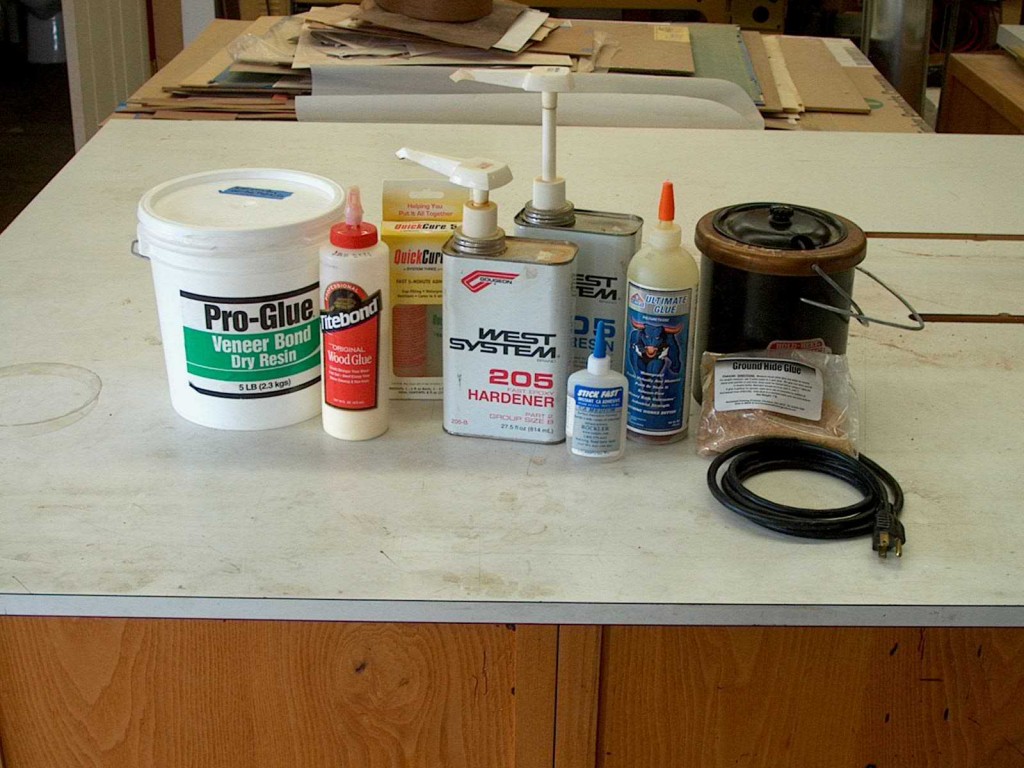
There are a number of common adhesives for woodworkers.  The two I use most often are plastic resin for veneering and hot hide glue for solid wood.  Occasionally I will use yellow glue for special situations, epoxy tinted with fresco powders to fill small defects, and expect to use cyanoacrylate as I explore wood turning.

There are several key fundamentals for strong glue joints.  When these are not followed, joints are much more likely to fail.

First, all adhesives must be used as intended by the manufacturer.  As examples, yellow glues skin over quickly, so joints must be assembled and clamped quickly; plastic resin glues need a minimum temperture of 70 degrees F to cure.

Second, glues need to be thoroughly brushed onto mating surfaces.  Applying a bead of glue to the end of a tenon and assembling the joint is very fast, but the adhesive bond is minimal.  Thoroughly brushing glue onto the sides of a mortise and inserting a dry tenon is an improvement, but still risks premature joint failure.  Excess glue squeezeout can create dreaded “glue stains” that interfere with staining, but is not caused by brushing glue on all surfaces.  It is caused by applying too much glue.

Third, joints have to be well made.  When edge gluing two boards, those edges need to be flat and straight over their entire lengths.  Mortise and tenon and dovetail joints should be a “friction fit” meaning slight pressure is needed to assembly and disassemble the dry joints.

Fourth, adequate clamping pressure has to be applied in a timely fashion until the adhesive cures. 

When a joint fails prematurely, take a look at the mating surfaces to see if the joint was well made and the mating surfaces show dried glue over the majority of their meeting surfaces.  Do not simply apply more glue and re-assemble without first properly preparing the joint.

Raw Veneer versus Hardwood Plywood

Not infrequently I’m asked “why bother working with raw veneer.”  For example, commercial walnut plywood is ready to use, while raw walnut veneer leaves have to be ordered, trimmed and edges jointed, taped into sheets, the sheets glued to a substrate, and the surfaces then sanded. 

A conceptual bookcase project may help explain the difference.  The bookcase will be in the middle of a long wall.  It will have a lower section with doors, and a set-back upper section with open adjustable shelves.  The doors of both examples will have panels faced with crotch figure.  Plywood will be used for the sides and back of both the lower and upper sections, and the shelves.  Solid wood will be used for the face frames and doors.

Using commercial walnut veneer, joints in the veneer likely will not be symmetric across the backs and sides. Almost certainly the grain pattern and figure will not be consistent across the inner and outer surfaces of the sides and the visible  back of the upper section.  The crotch veneer on the door panels may be gorgeous but too visual for the veneer on the hardwood plywood.  A stain and glazing may be advised to make less noticeable the differences in grain pattern and figures on the various plywood surfaces.  The lasting visual image may be the dark finish and not the wood.  After ten to fifteen years the dark finish may be considered a dated look and plans inititated for yet another bookcase.

By starting with raw veneer, the width and length of the raw veneer are chosen for the bookcase dimensions, and the leaves trimmed so that joints between the leaves are balanced and symmetric across the sides and backs of the lower and upper sections.  Bookmatched ropey quartersliced veneer could be used for the sides and backs to produce intriguing arrow or chevron patterns for added visual interest.   Walnut burl accents could be incorporated in the corners of the lower and upper sections to further tie them together.  And the crotch veneer door panels will look more part of a whole when matched with the bookmatched ropey walnut and burl accents.  A clear finish over oil would be appropriate to highlight all the character and beauty of the walnut wood.  The lasting visual impact of this bookcase would be the combination and use of figure and the wood itself.  This bookcase would be likely to become a family treasure to be kept for decades and desired by the next generation.

Veneers

One of the benefits of veneer is the seemingly endless variety of textures, grain patterns, colors, and figures.

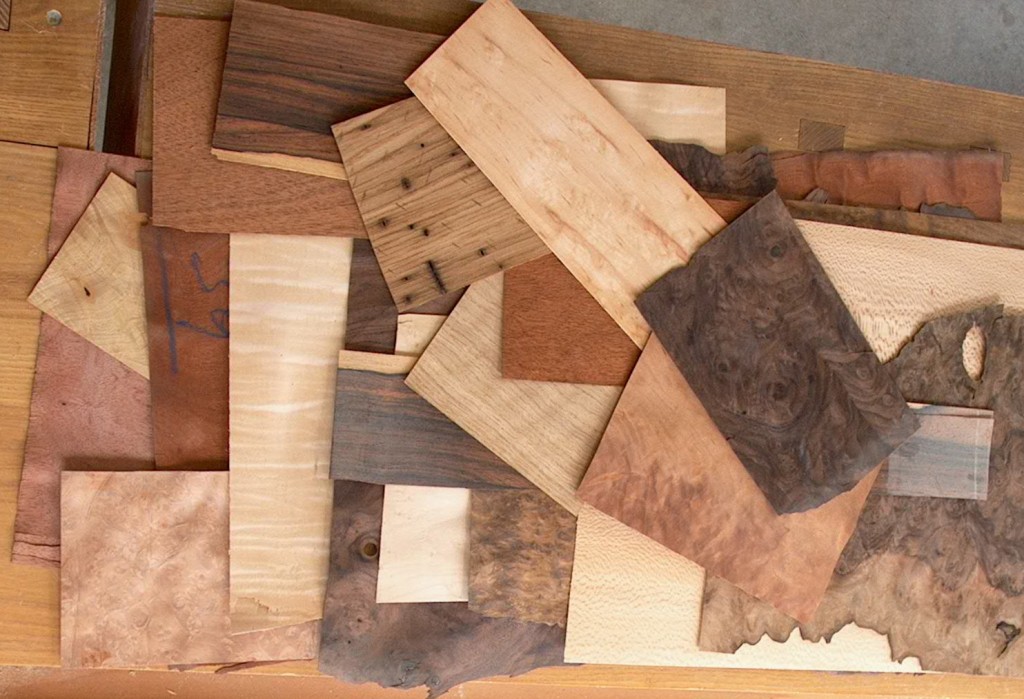
This collection of samples includes quarter sliced and flat sliced grain patterns; a piece sliced from a wormy log; burl, crotch, waterfall and mottle figures; and a wide range of colors.

Commercially produced veneer is sliced from a solid piece of wood, conceptually like the meat slicer in a delicatessan, so there is no waste.  The bottom surface of one slice of veneer is an exact copy of the top surface of the next slice.

Some of the solid wood from which these veneers were sliced are too unstable to be used as solid wood – they would undergo too much seasonal expansion and contraction, and sometimes warping, to be incorporated in furniture.  Additionally, burls, which are roundish growths sometimes seen on the side of a tree, are very decorative but small – several consecutive slices often are brought together edge to edge to create the needed length and width.

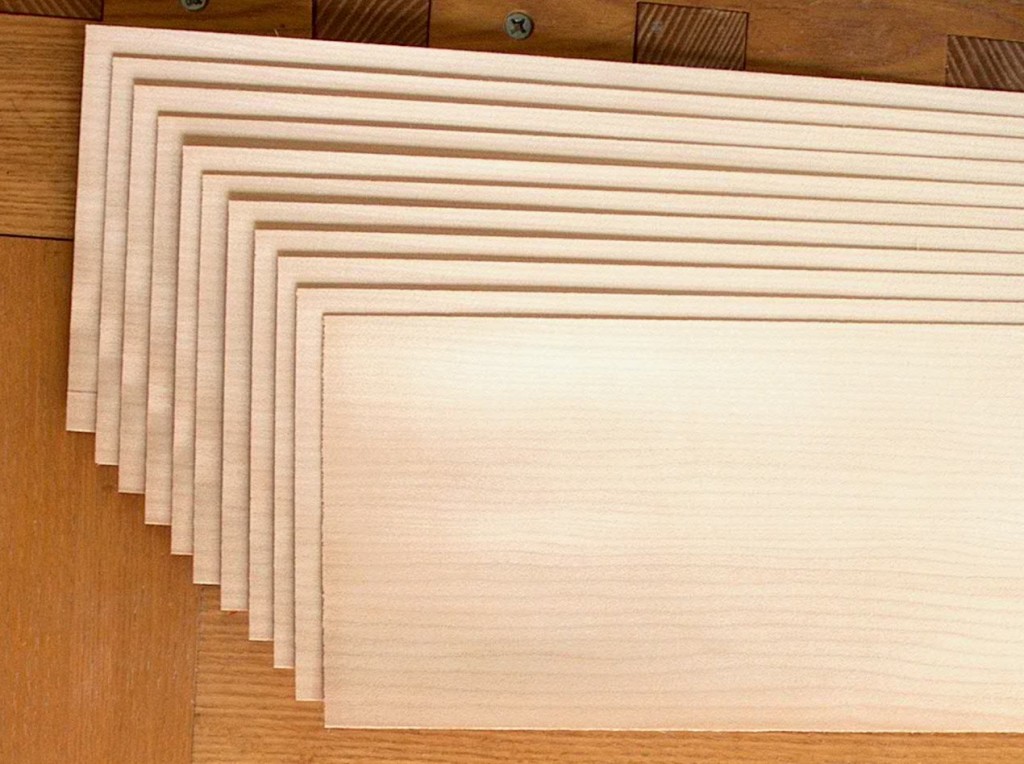
From initial slicing to a distributor and on to the end purchaser, veneer is always kept in sequence.  This picture one end of eleven sequential sheets of quarter sliced maple veneer, each about 110″ x 5 1/2″.

In use, veneer must be glued to a backer or substrate as it is too thin to have any strength of its own.  But it offers an amazing design range for custom furniture. 

There are several commercial suppliers of veneer.  The one I’m most familiar with, www.certainlywood.com, has its complete inventory in pictures on line under their “Wood Menu” tab for anyone who would like to see more of the woods, figures and colors that are available.

An Interesting Chair

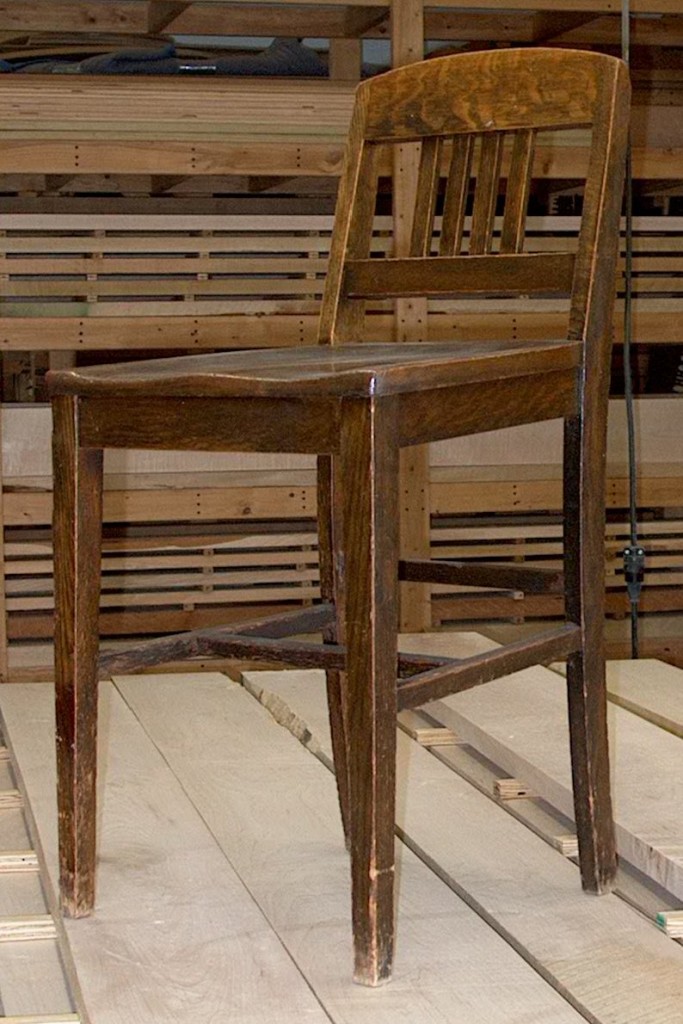
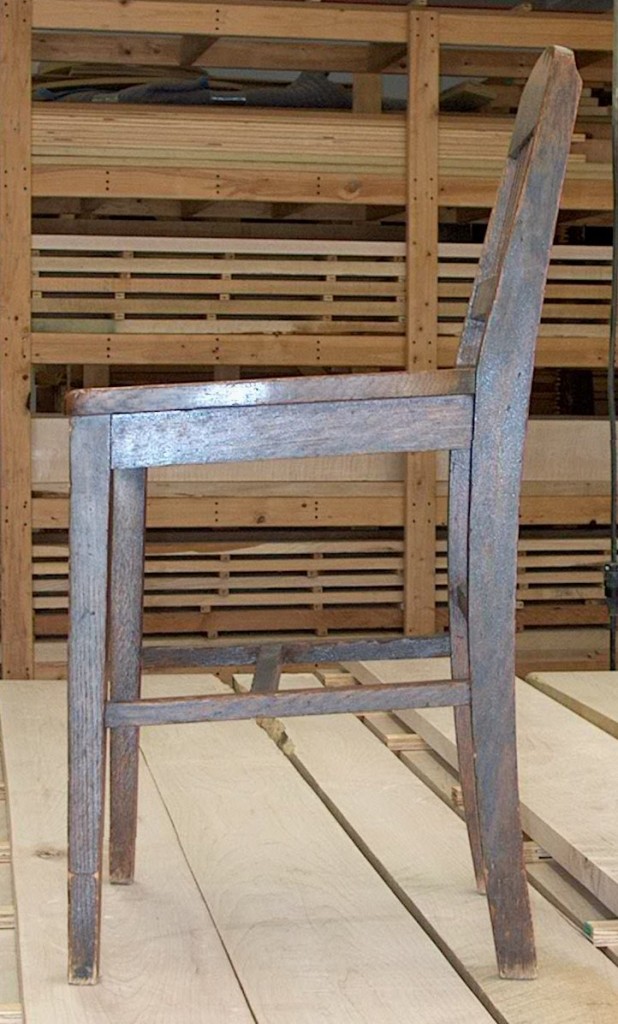
A gentleman brought in this chair considering having a similar one made using a different wood.  For several days I postponed calling with a price, trying to decide why the chair was so interesting visually.

Eventually I realized I kept looking back at the chair because there is so much visual tension in the design.  In most chairs, the back legs are closer together than the front legs, but that is just the beginning here.  The front legs lean towards the back, the seat slopes forward, and both edges of the back legs are curved, but they are not parallel.  The top of the rear legs is wider than the top cross member is thick, so the back top of the rear legs are scooped to transition between the two dimensions.

At 20 1/2″ off the floor, the front edge of the seat is higher than the normal 18-19″.  With the pronounced seat slope, I wonder if the chair was designed for a particular use, perhaps paired with a drafting table.

The owner finds the chair very comfortable, but about 1 1/2″ too tall.  If another is made, it would use primary and accent woods to match the intended use and immediate surroundings.

Sometimes a design can be just unique enough constantly to invite closer examination and study.  In certain situations this uniqueness can be a feature, othertimes a distraction.  But this chair has been a delight to have in the workshop these last few days.

Grain Patterns

Trees grow using annual growth rings, the coincentric circles seen in the end of a log or the top of a stump.  When a log is sawn into lumber, the faces and edges of a board intersect those growth rings.  The resulting patterns that appear on the faces and edges I call “grain patterns” and there are two basic types.

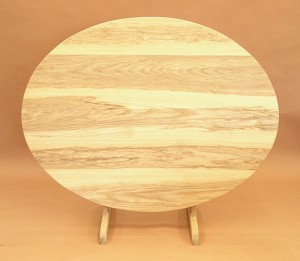
This provincial style table top has five boards.  The darker middle of each demonstrates “ovals and arches,” the most common type of grain pattern.  Some people prefer this grain pattern feeling it is more active and more natural.  When the grain pattern is fairly consistent across the boards, and somewhat centered in each, the result can have balance and appeal.


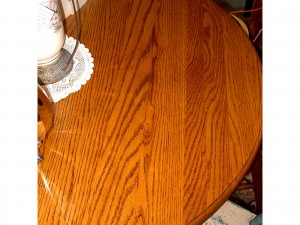
When the ovals and arches run off the edges of some of the boards, the result can be irritating.  This table found in a consignment shop is not very attractive.


The other basic type of grain pattern is “quartered and rift” resulting in fairly uniform parallel lines.   One of the boards in the above consignment table top shows a quartered and rift grain pattern.


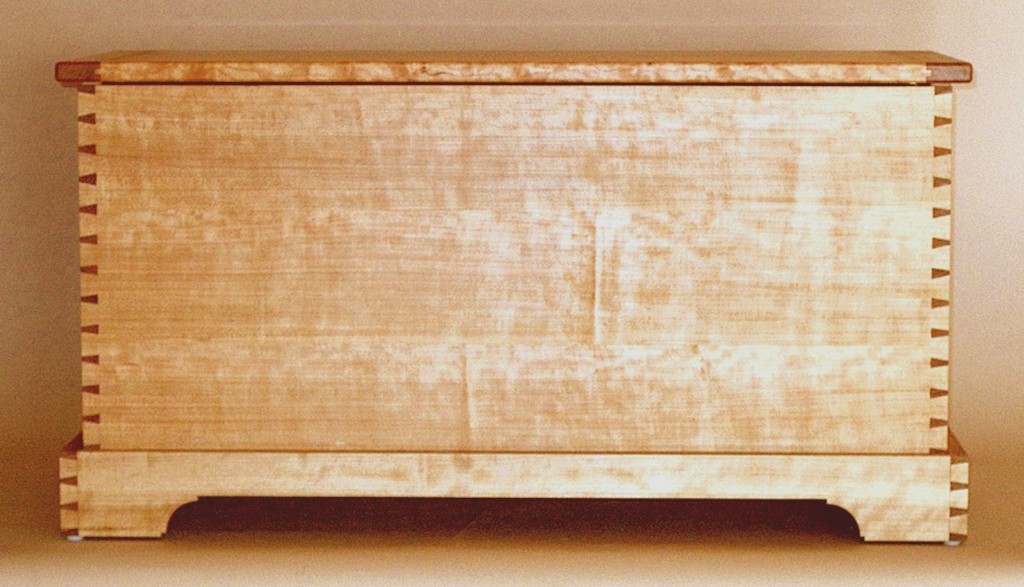
This blanket chest front shows three boards, each quartered and rift.  The “quieter” grain pattern allows the eye to focus on the overall front and dovetails, rather than the individual boards making up the front of the chest.

I keep a collection of example grain patterns in my workshop to examine and discuss with interested visitors.  In addition, a more detailed description can be found on my website at www.stephanwoodworking.com/CommonBoardGrainPatterns.htm.


Growing Bonds With A New Daughter-in-Law

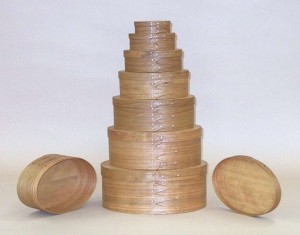
Imagine giving to a new daughter-in-law on her anniversary the next size of your set of handcrafted Shaker nesting oval boxes.  The annual exchange symbolizes the ever growing bonds between the families.  The partial nest in each household is a constant reminder of what is evolving.  And the practice can become a treasured family tradition to repeat with the next generation.

The Shakers are legendary for their sense of honor, commitment and craftsmanship.  A Shaker reproduction shows the recipient how much you love, respect and cherish them.

Handcrafted Shaker oval boxes show subtle variation in the trimming of the fingers and placement of the tacks and pegs.  In respect to the Shakers, there should not be any glue or filler used – craftsmanship is all.  The boxes will not have machine-like regularity, but neither do memories and traditions.

Needs Can Be Multifaceted

A need, such as for a dining table, seldom is one dimensional.  If it were, any horizontal platform would suffice.

Continuing the example, related kitchen dining table needs might be to blend with existing cabinetry or a favored furniture style, use a particular wood, be a particular color and hue, accomodate casserole dishes for those that cook from scratch or prefer longer meals, have extra space for two or three large boxes on family-and-frfiends pizza nights, and so on.

Noteworthy veneer combinations can result in a table that makes a lingering positive impression on invited guests.

For a family that emphasizes togetherness and life long bonds, a well built table that lasts for decades represents and kindles fond memories of time spent together, traditions and transitions.  Imagine sharing with friends and neighbors “I remember sitting at this table helping the kids with second grade homework, with college applications, and with wedding plans; yesterday I was feeding my grandchildren at this very same table.”

Furniture that serves a single need can be functional but remains an impersonal tool.  Furniture that answers a hierarchy of needs can make a dwelling a home and personalizes a room.

Vineyard Table Harp Base

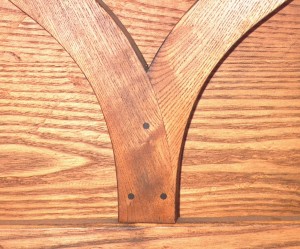
The pivoting harp on this piece made in the style of French provincial vineyard tables is a smoothly flowing curve from top to bottom.  The plan was found in a modern publication, but the half lap joint at the bottom of the harp was simplified into straight lines.  The transition interrupted the flow, and visually was unappealing.

About three hours were required to make and test a curved pattern for the bottom lap joint, but the result was well worth the investment.  The sinuous curve now extends unbroken from top to bottom for each side of the harp.

This small change elevated the resulting table from tolerable to charming, and rewards those who take a closer look.  A picture of the entire table and some details on the genre can be found at www.stephanwoodworking.com/TableDiningVineyard.htm  Additionally there are some pictures of antique vineyard tables in my workshop files I’d be happy to share if you’d like to drop by.

Renewable Finishes

Many of today’s commercially sprayed finishes are very durable, but that comes with a price.  Especially when built up into a thick film, those finishes are subject to chipping.  And if color was applied within the spraying sequence (toning and glazing) those chips will be not only low spots but also lighter color spots, making them more noticeable. 

Invisible repairs are almost impossible, according to a long-time commercial finisher/refinisher.  Stripping these modern sprayed finishes is difficult (i.e. expensive) because they are so hard.  So the most common “solution” is to throw the chipped furniture away and buy new.  But if the replacement has a similar finish . . .

Renewable finishes are an alternative. 

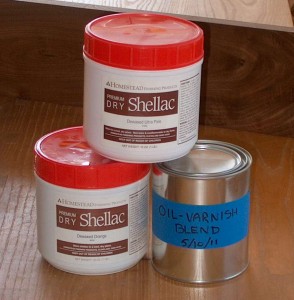
Whether brushed, padded or sprayed, shellac is a film finish that builds on the surface of the wood.  Shellac is widely considered one of the clearest finishes, so it allows to show through all the marvelous character and figure in wood.  Today’s dewaxed shellac is more resistant to water marks than the shellac of the 1800′s and 1900′s.  If the finish becomes worn in spots, in about a day, an experienced finisher can pad fresh shellac over the existing, and chips can be invisibly filled in with fresh shellac.

An oil-varnish blend is commonly equal parts varnish, boiled linseed oil and mineral spirits.  The oil component wonderfully warms wood and sometimes gives an almost three dimensional appearance to curl and other figure.  The first coat soaks into the wood, following coats add protection wthout building a noticeable film or shine. Three or four thin coats offer an unexpected level of resistance to water marks without eliminating the marvelous tactile sensation of wood surfaces.  Unlike shellac, scratches into the wood cannot be filled up with a fresh application, but the exposed lighter wood will blend into the rest of the surface with another wiped coat.  And like shellac, should the surface look a bit aged in areas of higher use another coat can be wiped on the piece to renew the finish.

Dewaxed shellac and oil-varnish can be applied with less waste,and  there is less likelihood of having to strip a finish (with accompanying hazardous waste).  These finishes should be treated with respect and common sense, but need not be feared.  And with a renwable finish, furniture perhaps is more likely to kept for decades, developing a wonderful patina with associated family memories.